No Room to Move !

Bareroot Apple Seedlings in My Hallway

Last Thursday I finally received the fruit tree seedlings that I’ve been waiting months for. The order contained 75 apple, 25 wild plum and 25 red elderberry plants which all arrived in a single box as bare-root seedlings. I had the trees shipped to my mother’s house where they could be protected from cold or rain as I would be at work when the mail arrived, and I didn’t want to come home to a package of cooked or frozen plants.

My sister Sandy and my mother decided to plant most of the trees for me, since they had the black planters and some good dirt. I was still feeling a bit under the weather after having a cold or flu in the beginning of the week, so I was pretty happy to be off the hook, and I was able to finish planting the rest of the trees in an hour or so.

Bareroot Apple Seedlings First Leaves

Bareroot Apple Seedlings First Leaves

The seedlings were left on my mothers porch for a few days so they could soak up the sun. After a few very nice and totally unseasonable warm days, I caught news that a freeze or frost advisory was in affect. All of the trees would need to be protected from the cold, so I borrowed my brothers truck and moved them all inside my home. Even after giving some of the trees away, I was still left with about 40 trees in little buckets, and 20 trees in large buckets, and they really take up a lot of room in my home.

Table Grape Leaf

Table Grape Leaf

On top of the trees, I have a few table grape clones which I planted a bit early this year, I also have 100 wine grape clones which really seem to be doing well.

Wine Grape Leaf

Wine Grape Leaf

The leaves on the new grapes are suprisingly different then those on table grapes.  I’m quite familiar with the table grape leaves as I’ve got about 10 varieties already growing, so I was pretty surprised when I saw the shiny and jagged grape leaves.

The grape clones have all but filled my normal seedling room, and combined with some experimental fruit tree seeds, and an incubator housing chicken eggs, the room has only enought standing area to water all of the plants.

Apache Blackberry Clone Trail

Apache Blackberry Clone Trail

On top of the grapes, fruit trees and seed experiments, my brother decided to try his own hand at cloning, and so I have some apache blackberry experimental clones in my kitchen.

Baby Parakeet

Baby Parakeet

In the living room, I have five parakeets, and one nest of three baby parakeets. They really have nothing to do with farming, but I guess this post is about useable space at home, and these birds use a lot of it. They’re awefully cute too, so I figured a picture wouldn’t hurt.

My goal with these creatures is to make them super friendly birds which can be held, or set on my shoulder for halloween to make me look like a pirate…. Rrr…

Chicken Eggs

Chicken Eggs

The chicken eggs round off the list of progress, with a small footprint but a good amount of care needed. They should hatch in a few days, and hopefully not long after that find new homes as I’m only incubating them for my sister. She assures me they will all be out of my hands by the time I can safely stop feeding them chick feed.

All in all, I might not have much space now, but I do have something far more valueable: Potential. Imagine what could be done with the grapes from a 100 vines, or apples from dozens of full size apple trees. I guess only time will tell, but for now, I’m more then happy to share some of my space for progress.

Posted in Apples, Chickens, Grapes, Pets, Trees, Uncategorized | Tagged , , , , , | 4 Comments

Spring has Sprung

Apple Buds
Apple Buds

Spring has sprung and with it comes a new period of growth to replace “the winter that never came”.  On the first days of spring the tempurature is nearly 35 degrees F. warmer then the average, and all of the plants and trees are responding as such.  This warming trend could be a problem if there is a frost or freeze in the next few months, all of the buds and leaves could be damaged due to the cold.

Pear Buds

Pear Buds

I remain hopefull that the trees and bushes will be spared a late freeze, and even thought the year has started out fairly warm, I’m making no bets about the possiblity of a late frost, so my target date to plant the garden is still June 1.

Chives

Chives

While investigating all of the new spring growth, I noticed that the chives in my rock garden have regrown from last year. They must have gone to seed last year, or regrown from their roots. The sage plants in the same garden are also growing again.

Garlic

Garlic

The fall planted garlic is growing great, and best of all, I haven’t had to weed the bed due to the thick layer of hay. I used the hay in the hopes of protecting the roots from a cold winter, but I’m quite happy it’s useful even when the weather is warm.

Gooseberries

Gooseberries

Gooseberries are even getting in the action, and growing fast.

Celery and Onions Seeds

Celery and Onions Seeds

And last but not least it seems the farmer himself is getting caugh up with the season. I’m about 4 days behind schedule since I somehow forgot to order celery seeds.  Once I had the seeds in hand, this project was finished quicker then I could say global warming.


Posted in Celery, Onions, Spring, Trees, Uncategorized, Weather | Tagged , , , | 2 Comments

Starting Early

Peach Pits

Peach Pits

I’ve been waiting for several months to experiment with fruit tree seeds, and the time is about right to thaw them out and give them a shot. The seeds have been stratifying in my freezer for several months, which simulates the cold winter conditions the pits would be exposed to in the wild. This process tricks the seed into thinking it has survived winter, and must now grow.

Peach, Cherry and Assorted Nut Seeds Planted

Peach, Cherry and Assorted Nut Seeds Planted

I used some tiny plastic cups to hold the potting soil and seeds. If the seeds are successful, I move them to large pots as needed. Each cup has multiple holes in the base for proper drainage, and I’ve soaked the potting soil to simulate spring ground conditions.  Now it’s just a matter of time till I see which seeds (if any) will grow. I’ve planted a miss-matched collection of cherry, peach, nectarines, and even some nuts in an attempt to learn which will “grow true” and which will not. The “peach” pits should definitely offer some surprises, as I left out some critical information when storing the seeds, and I’m not even sure if they are peach pits.

Crimson Seedless Clone

Crimson Seedless Clone

While I missed the boat on labeling the peach pits, I was very diligent when it came to preserving the information about the grapes I’m cloning. So far, I’ve got seven plants from four different varieties showing top growth. These canes are a few weeks ahead of schedule, but a welcome sign of spring, and an escape from this brown toned rainy winter.

Syrah Noir Clone

Syrah Noir Clone

Alicante Bouschet Clone

Alicante Bouschet Clone

Pinot Noir Clone

Pinot Noir Clone

In about four weeks, I’ll be receiving over 100 fruit trees, which will need to be planted into soil in much the same way the grapes are. Next, I need to locate some room to start early celery, pepper and tomato seeds, as the seedling room will be full by after all of the trees are added to the collection.

Posted in Cloning / Propogating, Fruit Trees, Grapes, Seeds, Uncategorized | Tagged , | Leave a comment

Cider Press Complete

Adonica Standing with the Press

For the past two days, I’ve had one item which has topped my agenda: Finishing and testing out the cider press I’ve been working on. A good friend, Adonica in the picture above, heard about my project and came over to give me a hand. She’s a very mechanically inclined girl, and her help was invaluable.

Base Detail With Plastic Liner

I added a few items to the original plan, including the plastic lining shown, as well as moveable basket holders. Rather then fasten the basket holders permanently in place, a bolt, washer and wing nut were used to allow some wiggle room in case the basket swelled from the cider. The plastic liner was used to help catch the cider and drain it off before it could soak into the trough base.

Basket With Apples
Basket With Apples

Finally, we cut up about ten store purchased apples and placed them in the basket for the first trial run. I assumed ten apples would fill the basket quite a bit more, but it was a test run, and I didn’t want to waste a lot of apples if something went wrong.

Inside the Cider Soaked Basket

The test run yielded a surprisingly small amount of cider, but after taking a look at the basket, I came to the conclusion that the previously untreated pine had soaked up a good amount of cider. I was still happy with the successful press, with one half of a cup of cider in hand, and no component failures to repair.

Finished Cider Press

Finished Cider Press

So there’s the finished press, after its first use. The next project is to sand and treat the wood, and figure out how to get this heavy press out of the second story of my shed.

I guess I should start planning an apple grinder next.

Posted in Apples, Building and Construction, Cider Press, People, Shed, Tools | Tagged , | Leave a comment

If You Want to Taste the Sun, Plant Grapes

Cloned Grape Vine
Cloned Grape Vine

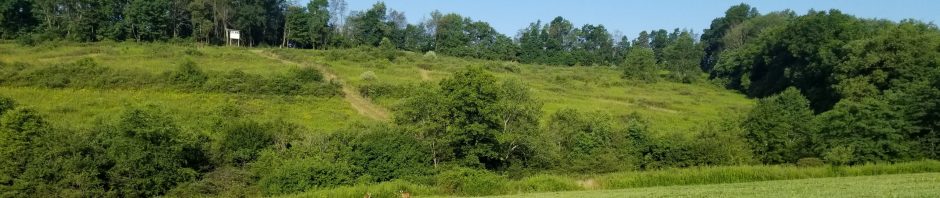
A few years ago I learned how to clone grape vines, with the intention of growing table grapes, and maybe someday making wine as a side project. Soon after, I began accumulating more and more varieties of grapes, including Concord, Thompson, White Niagara, Canadice, Blue Concord, Reliance, Niagara, Beta, Stueben, and a few unnamed varieties that had favorable crops.

While dad was still around, I made my first few bottles of “wine”, which I’m sure any person who has ever sipped wine would call gross, but it fermented, and more importantly, dad got to try it. We all agreed that the product of my experiment had a use, but flavor was not the reason you would drink it. I decided again that someday I would make more wine and take the subject more seriously.

A week or so ago, I got an email from Matt, offering me some cuttings  from some of his collection of wine grapes. I promply offered to take any cuttings available as I’m always expanding my collection. From these cuttings, I could then grow my own grape vines, and if they grow well in NW Pennslyvania, create my own wine.

Vine Cuttings

Vine Cuttings

A few days later I got 2 pictures from Matt showing all of the cuttings from his vinyard, and I was quite impressed. The cuttings filled the back seat and trunk of his car, and I could tell a good deal of work had gone into this project.  The email also included a FedEx tracking number for the box which had originated on the west coast. Once I had the tracking number I realized I had better get some preparations done on my end. I purchased a 2.5 cubit foot bag of Miracle Gro Potting soil, and a large bag full of styrofoam cups. I located lot’s of aluminum baking pans which would hold the cups, and cleaned them out.

Assorted Cuttings

Assorted Cuttings

Another day or two passed by, and I recieved two boxes in the mail, packed with lots of cuttings. When I opened the box and looked at the cuttings I felt overjoyed, even a bit overwhelmed with the gift I had been given. The cuttings had a unique smell, and coloring, something I think reflects the enviroment they were grown in, with far more sun than the vines I usually see. It’s almost as if I could see the sun’s bleaching effect on the vines, and smell the air in which they had grown.

Each Variant Labeled

Each Variant Labeled

Each variant was carefully covered in wet tissue on the base of the cuttings, wrapped in plastic and labeled. The moisture helped the vines in their cross country transit, and the labeling is invaluable as unkown varieties would require painstaking identification before wine could be produced.

Index of Varieties

Index of Varieties

As I unwrapped each bundle, I made an index of variants and the codes I would use to indentify them with. It would be far too time consuming to write the entire name and affix it to each cutting, so I gave each type a unique number as well as a short version of it’s name. The shortened name would be invaluable if I lost the index, and the unique number helps with planning.

Cuttings Ready for Water

Cuttings Ready for Water

After three hours of work, I had all of the cuttings placed in potting soil and ready for water. The vines need to be kept moist, and out of direct sunlight, and in a few weeks time, they will begin growing new green growth. At this point I’d love to turn the water a deep green color with the help of Miracle Gro plant food, but I want to encourage root growth, and Miracle Gro will bring out top growth.

So where does root stock come into my plan ? Well, I’ve decided to continue the plan I’ve already got in place: Test varieties for their fitness in this enviroment, and allow the vines to grow quite a bit. In three to five years I should have more knowledge of the subject, and large vines from which to extract cuttings. At that point I’ll plan my vinyard.

Here’s the list of new varieties:

Grenache Noir:

Plant Zones 7-10 per:
http://www.backyardgardener.com/plantname/pda_c95a-2.html
Information:
http://en.wikipedia.org/wiki/Grenache http://www.winepros.org/wine101/grape_profiles/grenache.htm

Petite Syrah:

Information:
http://www.winelabels.org/artsirah.htm

Chardonnay:

Plant Zones 5 – 8 per:
http://www.starkbros.com/growing-guide/plant-manuals/berry-plants/grape-vines/chardonnay-grape
Plant Zones 7 – 10 per:
http://www.monrovia.com/plant-catalog/plants/2850/chardonnay-grape.php

Information:
http://www.winemakermag.com/stories/grapes/article/indices/22-grape-growing/989-growing-chardonnay-backyard-vines http://www.monrovia.com/plant-catalog/plants/2850/chardonnay-grape.php

Italia:

Plant Zones 7-10 per:
http://www.backyardgardener.com/plantname/pda_5b52-2.html

Alicante Bouscet:

Information:
http://en.wikipedia.org/wiki/Alicante_Bouschet
http://eater.com/archives/2011/06/28/alicante-bouschet-prohibitions-darling-grape.php

Tempranillo:

Plant Zones 7 – 10 per: http://www.backyardgardener.com/plantname/pda_2dcf.html

Information:
http://en.wikipedia.org/wiki/Tempranillo
http://www.mailtribune.com/apps/pbcs.dll/article?AID=/20090101/DISTINCTLYNORTHWEST/901010307/-1/DISTINCTLYNORTHWEST03

Pinot Noir:

Plant Zones 6 – 10 (map indicated NW PA ok): http://www.willisorchards.com/product/Pinot+Noir+Wine+Grape+Vine

Information: http://topics.nytimes.com/top/reference/timestopics/subjects/w/wines/pinot_noir_us/index.html http://en.wikipedia.org/wiki/Pinot_noir

Zinfandel:

Plant Zones  6 – 10 per:
http://www.aaronsfarm.com/Zinfandel-Grape-p/zinfandel-grape-vine.htm

Information:
http://zinfandel.org/uploads/Zin3_web%20version.pdf

Syrah Noir:

Plant Zone: No zone mentioned, but “can survive in just about any given circumstance”: (requires membership)
http://www.winebusiness.com/wbm/?go=getArticleSignIn&dataId=32886

Information:
http://thewinespies.com/directory/wine/1425

Summer Muscat:

Information:
http://sigonas.wordpress.com/2009/03/06/muscat-grapes-a-little-taste-of-summer-with-a-burst-of-flavor/

Barberra:

Plant Zone 7a per:
http://www.doubleavineyards.com/c-1-buy-grapevines.aspx
Plant Zones 7 – 10 per:
http://www.backyardgardener.com/plantname/pda_b8c4-2.html
Information:
http://en.wikipedia.org/wiki/Barbera http://www.alcoholwine.com/red-wine/barbera

Sauvignon Blanc:

Plant Zones 6 – 10 per (map indicated NW PA ok): http://www.willisorchards.com/product/Sauvignon+Blanc+Wine+Grape+Vine?category=262

Plant Zones 6 – 10 per: 
http://www.willisorchards.com/product/Sauvignon+Blanc+Wine+Grape+Vine?category=262
Information:
http://en.wikipedia.org/wiki/Sauvignon_blanc

Sangiovese:

Plant Zones 7 – 10 per:
http://www.backyardgardener.com/plantname/pda_8fa0-3.html
Information:
http://en.wikipedia.org/wiki/Sangiovese

Cabrenet Sauvignon:

Plant Zones 6 – 10 per:
http://www.tytyga.com/Cabernet-Sauvignon-Grape-p/cabernet-sauvignon-grape-vine.htm
Plant Zones 7 – 10 per:
http://www.monrovia.com/plant-catalog/plants/2849/cabernet-sauvignon-grape.php

Information:
http://en.wikipedia.org/wiki/Cabernet_Sauvignon

Here’s are some additional helpful links about wine grapes:

Wine Pronunciation Guide:
http://www.davidstuff.com/wine/pronounce.htm
Types of Red Wine:
http://www.basic-wine-knowledge.com/types-of-red-wine.html
Buy Grapes:
http://www.willisorchards.com/category/Wine+Grape+Vines

Posted in Cloning / Propogating, Grapes, People, Wine | Tagged , , , , , , , , , , , , , , , , | 1 Comment

Cider Press Progress

Notched Landscape Timbers

After working hard all summer on my shed and it’s second story wood shop, I’ve finally gotten started on my first serious project: A cider press.  The design isn’t really that complicated, but it requires a great deal of pieces, and I’m trying to put them altogether with the least amount of money as possible.

The winter months drive my heating costs thought the roof, and so I really can’t afford to spend much on this project till spring, which is the worst time for me to work on it. I’ll be too busy planting, weeding, watering and mowing for construction. So rather than miss out, I’m using a MacGyver like mindset when it comes to construction materials.

Notched Frames

Notched Frames

In place of treated 4 x 4 posts, I have once again turned to Landscape timbers. We have lots of them on the farm due to a past purchase of several pallets, and they are treated for the weather…. seems logical. Two sides are rounded, and two are flat, so some trimming here or there is needed, but I’ve been here before, as my greenhouse frame was created using the same posts. If for whatever reason they turn out to be unfit for this application, I can replace them fairly easily with 4 x 4 posts, when the heating costs level off a bit.

Nearly Completed Press Frame

Nearly Completed Press Frame

The frame is nearly complete, with very little work left. I need to purchase some strong bolts to hold the whole frame together, again that will have to wait. For now I’ve got the frame held together with the help of gravity and a short green extension cord. The feet are notched, and even without the bolts the notches line up well enough to keep it from tipping over.

Trough Base

Trough Base

Once the frame was as complete as I could create for now, I moved on to the trough. I wanted to use untreated wood in this area, and the only material that fit the bill was some rough cut pine from a tree on the farm. When I say rough cut, I mean the boards still carry the scars of the saw mill blade which ripped the tree into slices. The thickness of the boards range from a bit less than 1″ to over 1-1/4″.

I began cutting each board to size, figuring I would smooth them down later, either with a rasp or hand sander. After a few hours it dawned on me that I could use the blade of my table saw to smooth out the pieces, and you can see the marks the blade made of some of the components in the trough base. I’ll sand those out later.

Trough With Slats and Basket Centers

Trough With Slats and Basket Centers

I started getting used to this “poor mans planner”, and got pretty good at it. I moved on to the trough slats running every edge past the blade to make smooth pieces. At this point, I was very proud of myself for turning rough cut lumber into smooth slats.

Basket Slats

Basket Slats

After taking a break for an hour or so, I returned to cut the Basket Slats, which will hold in the apple chunks as they are pressed. The basket requires 38 slats so I decided to only cut two sides smooth, the inner and outer edges. This would leave the rough cut portion in the spaces between the slats, where there will only be a 3/32″ gap. I’ll smooth them down a bit with some sand paper, but I think they will function just fine as is.

Next, I need to build the jack press base, but I’m going to wait till I order a hydraulic jack, and measure the basket. This will allow me to “build it once” so to speak, and not need to make adjustments later.

Now I just need 8  bolts for the frame and about 76 for the basket, along with two stripes of metal strong enough to hold the basket together while it’s under pressure.

All in all, I’m really happy with the progress and speed with which it’s all coming together. Here’s hoping I can keep it up and finish this project before planting time.

Posted in Apples, Building and Construction, Cider Press, Planning, Shed, Tools, Uncategorized | Tagged , , , , , , , , , , , | Leave a comment

Spring Projects for 2012

Cider Press
Cider Press

While the weather is still cool, and before the garden demands so much of my time, I hope to build a cider press in the same basic design as shown above. It’s a very clever setup that makes use of a hydralic jack and some very strong timbers to squeeze the juice out of apples without too much effort. I also hope to build a apple grinder where I will premash the apples before squishing them in the press. If your interested in creating your own press, the original plans are available on the Van Vliet website, simply click the image above to load the page.

Seedling Order Form

Seedling Order Form

The cider press project will dove-tail very nicely with another of my spring plans. I’ve made another significant committment to the farm in the form of fruit trees, 125 of them to be sure. My order form included the request for 75 assorted apple seedlings, 25 red elderberry plants, and 25 wild plum trees. The seedlings should arrive in the beginning days of April, and they will be much smaller then all of the fruit trees I’ve planted thus far.

The form states the plants with range from 6 – 12 inches tall, and I’m planning to create a fenced in temporary nursery where the trees will be protected while they are vertically challenged.

Dangers Lurk

Dangers Lurk

I’m not so worried that wild animals will do damage to the trees, but I’ve already seen some medeling goats munch on a few of my trees. My niece has several goats as pets, and sometimes these marauders escape their shelters and roam freely. They are very short animals, and at less then three feet tall, they seem to favor the shortest and the most vulnerable of the trees. One of the trees to the left of this photo is missing the entire top of it’s stem, and I’m guessing we can all imagine why.

So there they are, my three projects for this spring, with the end goal being Apple Sauce, Apple Cider, and maybe something sippable with a bit more kick to it. It’s all part of my plan to live healthy, wisely and close to the land as our forefathers have for generations.

Posted in Apples, Building and Construction, Goats, Planning | Tagged , , , , , , , , | Leave a comment

The Wild Side

Wild Turkeys

Wild Turkeys

While leaving for work the other morning, I spotted a large group of turkeys standing in the middle of the long lane which connects the valley to civilization. The birds seemed to be resting until they spotted me and my camera pointed right at them. I didn’t have much time to take the shot, so I took what I could, bad lighting and all.

Turkeys Fleeing

Turkeys Fleeing

As soon as I clicked off the first shot, I attempted another, and I was rewarded with a picture of these birds flying away.

Turkeys Flying

Turkeys Flying

I never thought turkeys could fly, but after seeing them in action, I discovered the truth. Wild turkeys will fly if they feel threatened.

After seeing so many birds, I’m wondering what I can do to attract them to the farm, or how I can help to increase their numbers. I’m not yet a turkey hunter, but then again, I never thought I would be drying a deer hide, and yet that’s one side project I’ve been working on.

Deer Skin Furry Side

Deer Skin Furry Side

The deer skin shown was from a deer that was harvested on the same side of the hill where my home rests. I’m drying it in an attempt to learn some new skills, and eventually I would like to use the skin as a rug under my rustic looking coffee table.

Deer Skin Smooth Side

Deer Skin Smooth Side

Here’s the other side of the skin, after I’ve completely dried out the flesh with salt. The next step will involve rehydrating the pelt, and then tanning it. There are several methods for tanning, but I hope to use the store bought chemical method, as opposed to using the gray matter of the source deer as a tanning agent. Lets just say I’m not quite ready to get gray matter on my hands, althought that’s the method that has been used by our ancestors for thousands of years. After the tanning, I plan to bathe the skin in smoke to give it the characteristic tan color.

Brussels Sprouts

Brussels Sprouts

I’m also learning that I need to adjust the time of year when I plant Brussels Sprouts, as the three plants in my garden look like they have had it for the year. The leaves are turning brown, and the sprouts themselves appear more like leaf lettuce then a small bundle of cabbage. I’ll try again next year, and keep it up till I get it right. That’s the stubburn nature that got me this far gardening, and I guess you could say it’s how I do things, just to see if I can.


Posted in Brussels Sprouts, Deer, Turkey, Wild Animals | Tagged , , , , | 2 Comments

Seasonal Pruning

Unruly Dwarf Apple Tree

Unruly Dwarf Apple Tree

January is here, and so is my que to prune the fruit trees on the farm. I have been waiting for a good cold frost to put the trees in a deep slumber, and mother nature helped a week or so ago with some very cold days. After those few days I was convinced that the weather would stay cold for the next month or two, and that I would be forced to prune the trees while battling the cold.

When the mercury rose above freezing over the weekend, I figured it would be best to work with nature, and take the time to prune the trees while it was warm.

Sharpening the Sheers

Sharpening the Sheers

Some things to keep in mind while pruning:

Sharp Blade Needed:

When pruning trees, you need a sharp blade on the cutting instrument. This is true whether your using a chain saw, pruning shears or a hand saw. Dull blades tend to damage the tree in much the same way that a dull blade produces a far worse cut on your skin then a sharp blade. A sharp blade produces a clean cut which is easier for the tree or skin to recover from.

Cut Close, but Not Too Close:

When cutting off branches it’s important to leave a small nub behind where the branch purtrudes. I’d recommend leaving about a half inch to an inch depending on the size of the branch being cut off. There is a special cushion zone in this part of the branch that allows the tree to scab over easily. You can see this as the branch thickes a bit right before connecting to the trunk. If you cut this cushion zone off, the tree truck itself will be susceptible to disease and premature rot.

What Branches to Cut:

The ideal tree branch will seperate from the tree trunk at a 45 Degree angle. You can see this angle in the photo below. The two lightest colored, and thickest branches form and angle of about 45 Degrees. This angle allows the branch to hold a lot of fruit, and not break. I generally prune branches that point downward, or directly out at a 90 Degree angle. It’s also important to prune vertical branches so that two close branches aren’t competing for the same area. The weeker of the two should be cut.

Remember that pruning is not an exact science, but even if your just learning, it will still be beneficial to your trees. This is my second or third year of pruning, and each time I practice the trees reward my efforts with larger yeilds and larger fruit.

Large Apple Tree Pruned

Large Apple Tree Pruned

One of the largest trees in the front orchard is a apple tree that grew on it’s own. When this little tree first began to grow we didn’t know what it was and we were constantly running it over with the lawn mower. The tree never gave up, and grew fast, until it was too big for the mower to pass over, and which point we decided to let it grow and see what kind of fruit it produced.

The tree finally grew large enought that it required pruning, and so I basically chopped all of the lower branches off so I could mow around the tree without losing my hat. This along with good weather for apples allowed the tree to grow lots of large apples, which we made into dozens of jars of apple sauce.

Grape Cuttings

Grape Cuttings

After pruning many of the fruit trees in the front of my home, Davy and I moved onto the grape vines, pruning two of three arbors. When pruning the grapes, I made it a point to cut anything hanging over the arbor, and I cut some very large vines. Grapes will only grow from new first year growth, so the older vines are using up some of the resources the plant could be using to produce grapes.

I then selected some cutting which I hope to grow into new vines when they grow new roots. If your interested in doing the same, check out: Propogating Grapes Revisited.

Posted in Fruit Trees, Grapes, Pruning | Tagged , , , | Leave a comment

A Year of Growth: 2011

New Equipment on the Farm

New Equipment on the Farm

Another year has passed on the farm, and as the old year passes by, it leaves changes much like a glacier grinding and pushing its way to the sea. 2011 brought lots of new equipment and experiences to the farm, including a new John Deere tractor, and a much older yet still very effective 8n Ford tractor. The two tractors work great in tandam, making the hard work of yester-years into play time on full sized toys. The two tractors share lots of interchangable attachments including a back blade, brush hog, finish mower and more.  Once we got up to speed on how the tractors worked and what we could do with them, everything changed. Tasks that were difficult became easy, and what was once impossible is now do-able.

Improvements to the Land

Improvements to the Land

With the power of many horses under our feet, we began to transform the land directly in front of my home from a thicket of brush into a smooth flowing lawn, complete with a meandering stream which runs through the center. This will be the land where I continue planting cherries, berries and fruit trees, as I’ve nearly run out of space close to the house. I’ve also found time to build a herb garden with lot’s of old field stones.

New Shed and Workshop

New Shed and Workshop

The year has also been shaped a great deal by the construction of a new shed. The idea began as a chicken coop, but as soon as I began construction of the shed in my minds eye I envisioned a work shop and extra storage for many of my tools. The shed demanded a good deal of my time, and I’ve had lots of help with the design and general construction. That project is now complete for the year, and the workshop is quickly being stocked and organized. I’ve built a study building that should last for decades, and its large enough that I have extra room for future use.

First Book

First Book

While the sun was hidden from view I put together my first book, which expands upon my first few years in the garden. After returning from work, and putting away my shed construction tools, I would edit, layout and revise my story,  producing a 70 + page tale of trials and some errors on my path to master gardening. You can read more about the book by clicking here.

Battling Late Blight

Battling Late Blight

In 2009 and 2010 I had well over 100 tomato plants die due to late blight, and I lost the majority of the tomato harvest to this pest. It’s a difficult thing to loose so much hard work to something which is hard to see, but in 2011 I fought back with the conviction of a four star general. I drew up “battle plans” and stuck to the program, using Epson Salt and “Dragoon Dust” to protect the plants and destroy the enemy.

The blight managed to kill a plant or two, but I treated the outbreak much like the CDC would treat a case of SARS. I carefully covered the infected plants with a garbage bag, then ripped the roots from the soil, being carefull to isolate the infected plant. After torching the exposed plant matter, I redoubled my efforts in blight prevention. I took a doctor’s approach towards treatment, and gave the plants a heavy dose of Miracle Grow to keep them strong, while dusting the area exposed with an extra serving of anti-fungal agents.

At the end of the season it was clear that the blight had not succeded in robbing my harvest yet again. The tomatoes flowed from the garden like water spraying from a badly leaking hose.

Canned Tomatoes

Canned Tomatoes

With the endless bounty that streamed in from the garden, we all learned the fine points of food preservation, including canning, freezing and even vacuum sealing veggies. 2011 has been a great year for the garden, with two exceptions: Cucumbers and Zucchini.

I only managed to grow a few cucumbers, unlike past years when I would require a back pack in order to pick a row of cucks. The zucchini wasn’t nearly as bad, but it also suffered due to a thousand bites from pesky ground hogs. Overall, I’m very happy to see so much progress in hind sight. I’ve grown a great deal this year, perhaps more then the last five years combined. I’ve extended my garden season into the winter with Broccolli, Cualiflower and Brussels Sprouts, and I’ve demonstrated stubborn commitment towards shed construction.

Everyone on the farm has been learning and working together very well, and I think the outcome of this years labor is a testement to that effort. I hope to redouble my planning in 2012, and deliver even better results in the new year.

Happy New Year !

– I.T. Farmer

Posted in 8N Ford Tractor, Afflictions, Apples, Building and Construction, Cauliflower, General, Tomatoes | Tagged , , , , , , , | 3 Comments