Pandemic Panic

Squashes, Lettuce, Tomatoes

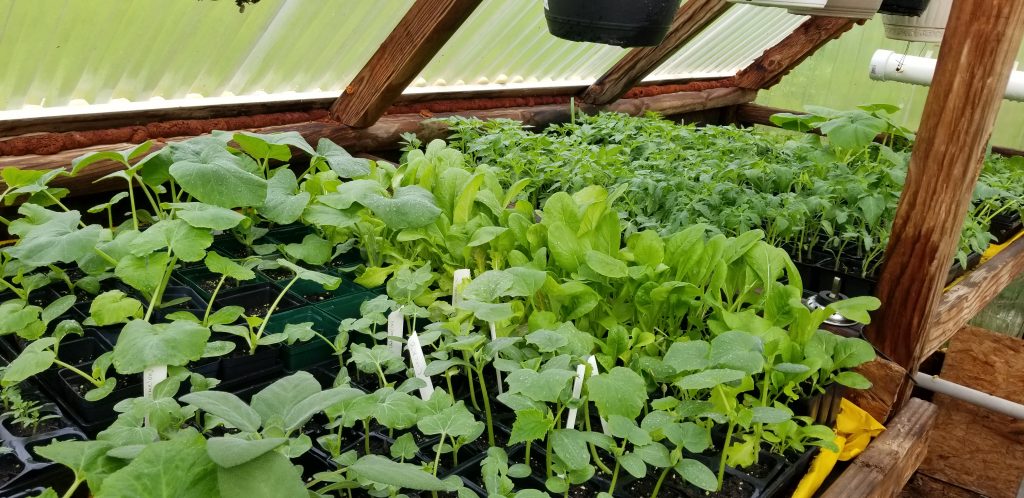
This year Kassy and I found ourselves in the greenhouse right about the time when the number of new cases of Corona was increasing exponentially, just before they peaked, and not long after very real meat shortages began. I assumed a constant stream of new cases, and so we did what any dignified gardeners would do: Plant like crazy! We started with Tomatoes and placed nearly 600 seeds in the soil. Next up Peppers with a more conservative 160 seeds, many of which just recently germinated.

Acorn, Butternut and Zucchini plants in the back. Late germinating peppers up front.

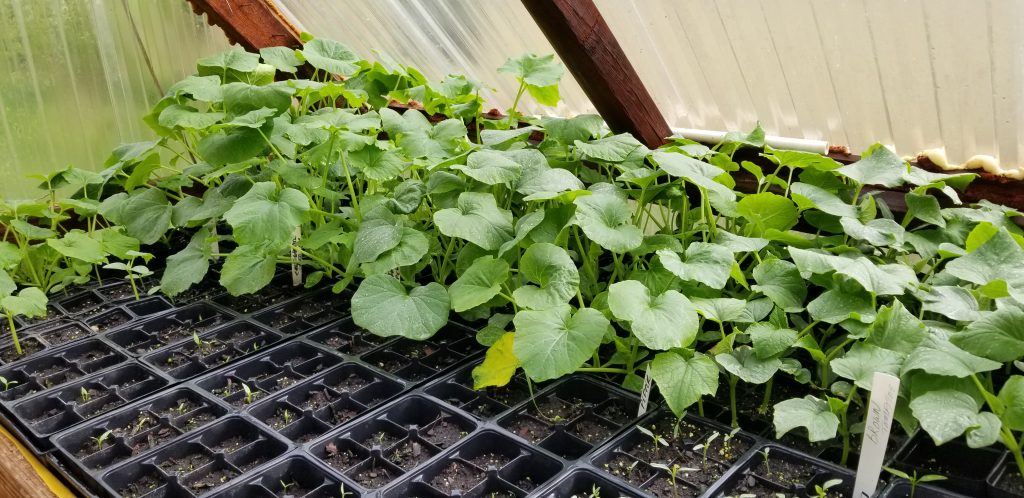
After tomatoes, we switched focus to winter squashes. Butternut, Spaghetti squash and Acorn squash have been known to last well into February if stored properly, and so I stopped counting seeds after the sixth tray of Acorn squash.

Squashes, flowers

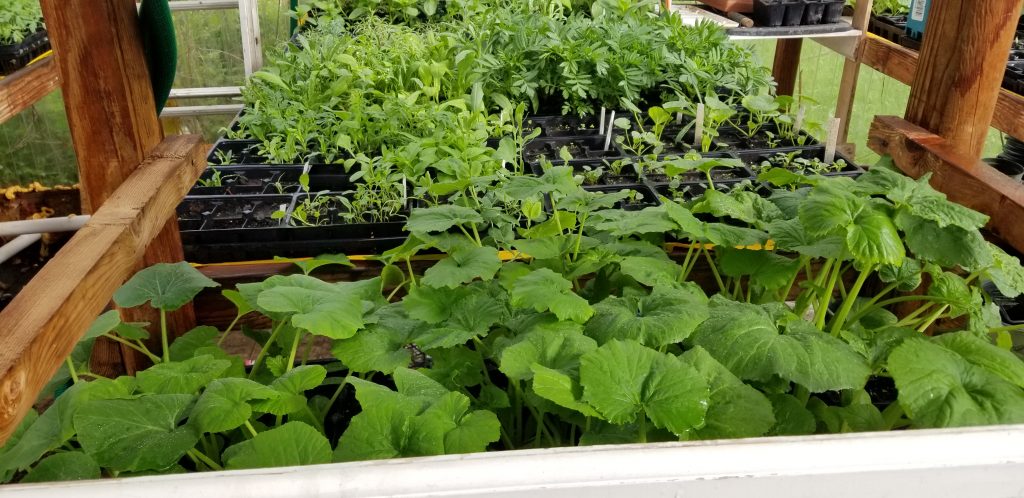
Kassy planted her traditional center tray full of flowers. At first, I think she assumed that she was losing her normal center tray so that I could grow more food, but I made clear her flowers were a necessity. I just so happened to add a three-tiered shelf right in front to hold more veggies.

Tomato Clones

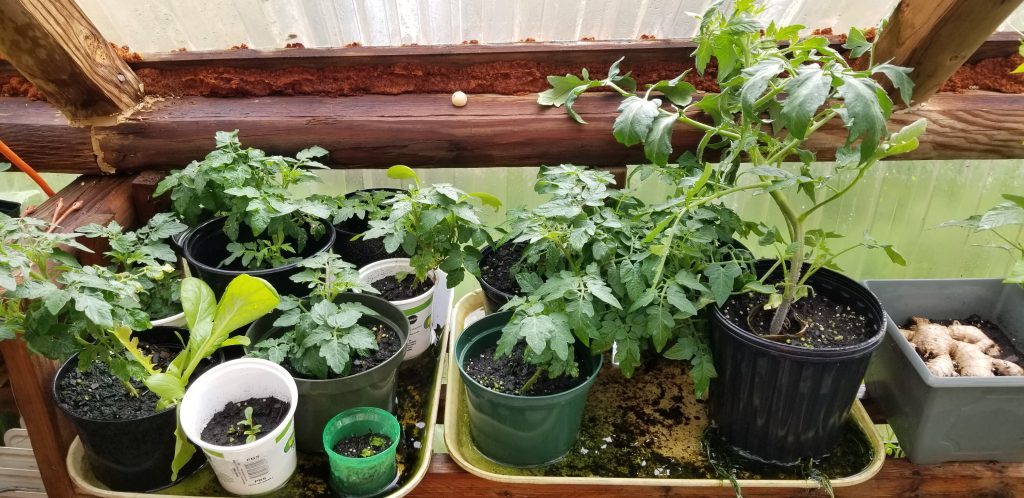
Two years ago I received a Aerogarden that allows me to grow cherry tomatoes indoors all year round. This spring I decided to trim the plant and place the trimmings in water to grow new roots. After they had roots I potted them up and placed them in a shaded part of the greenhouse for a few days. Once they were used to the sunlight, I moved them into their current location. You can tell the plants are getting plenty of sunlight as they are compact and not reaching for the sun.

Peas growing in a tube

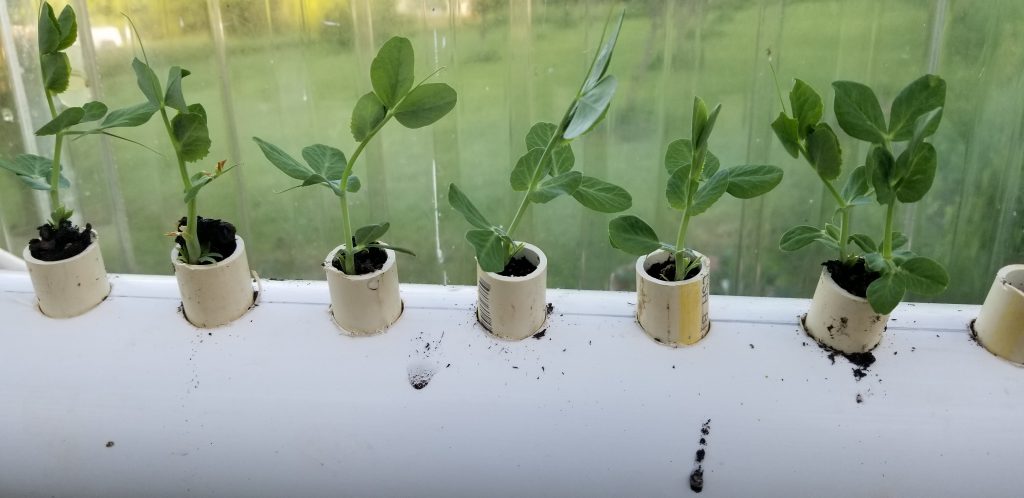
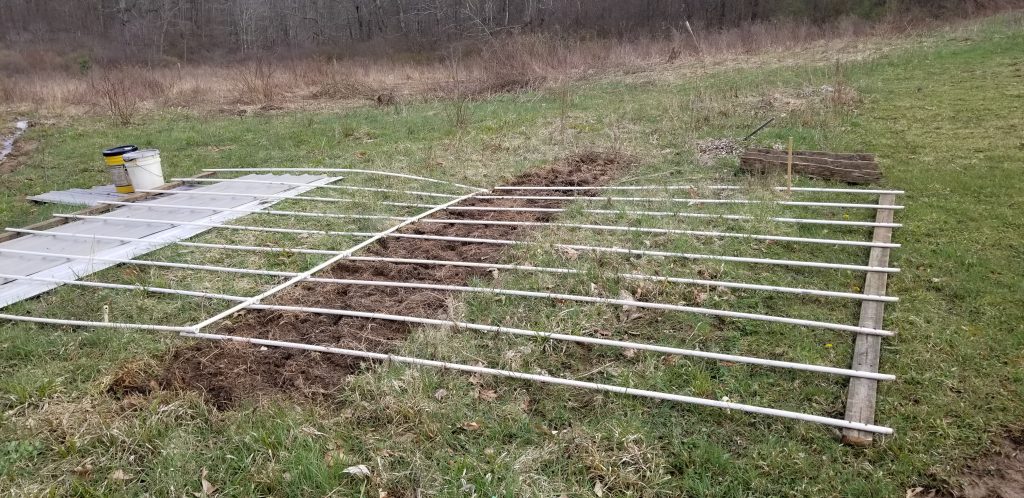
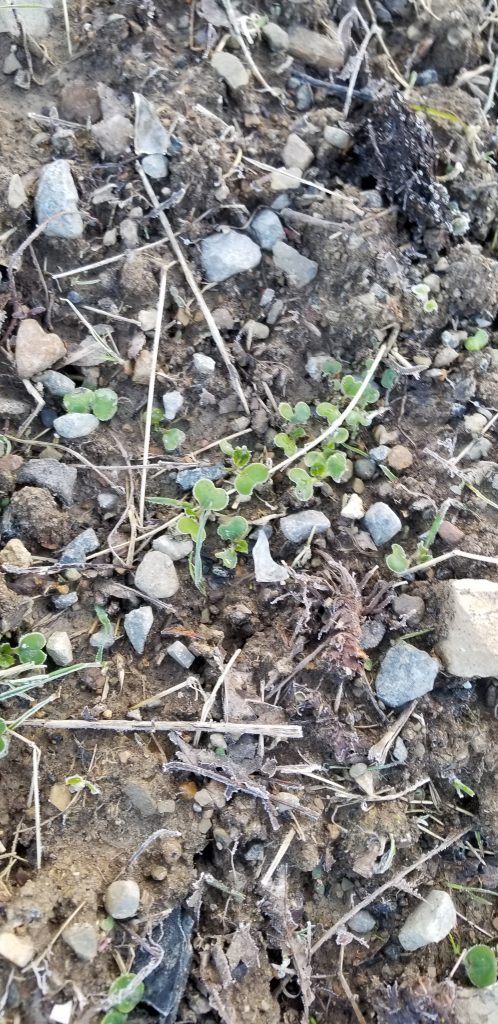
I’m also trying a new method to grow peas. Peas are very easy to grow, but I almost never get any from my garden. Every year it seems one critter or another figures out how to get around the electric fence and eat them all before I can pick them. This year I will not be beaten, and have decided to try this vertical growing method.

Pea roots in a tube, in a tube of water

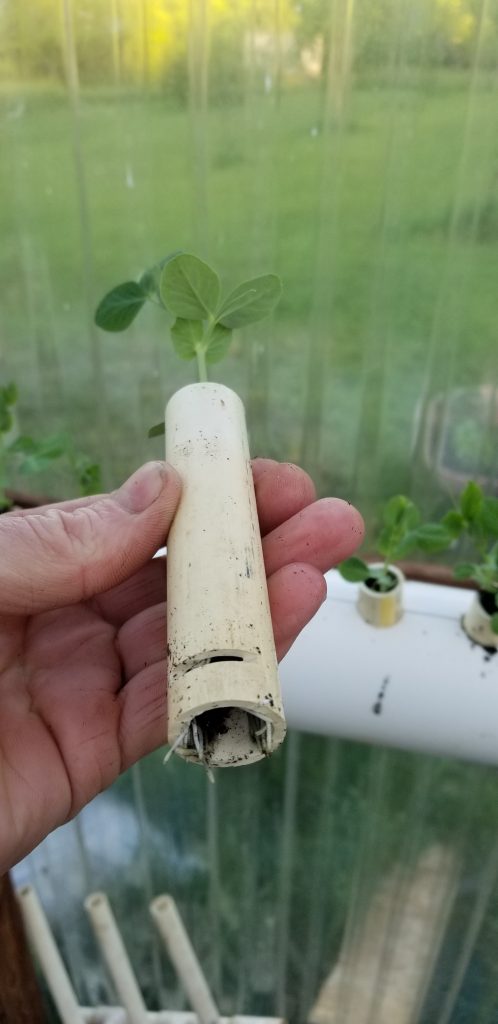
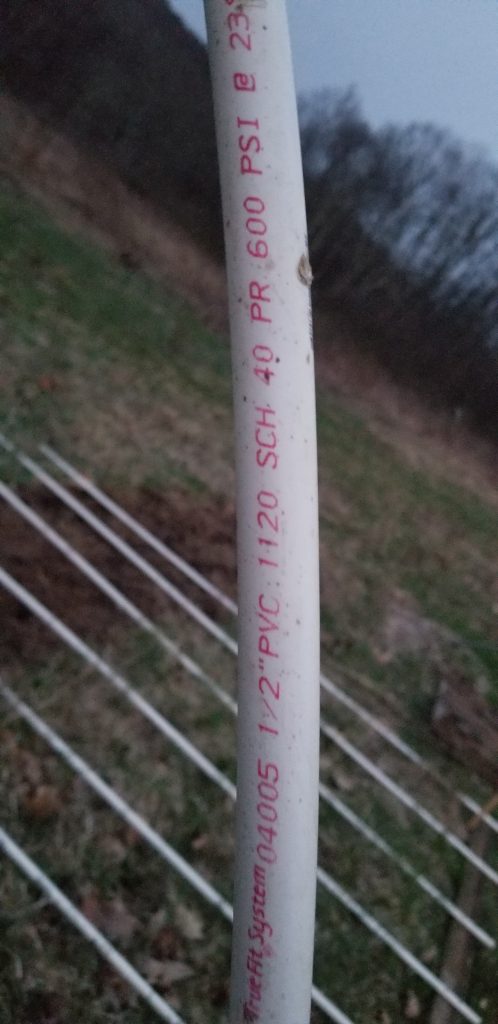
So the idea here is pretty simple, and based on Hydroponics: I have a large tube capped on both ends with holes drilled every inch and filled with water. The holes have small PVC pipe sections filled with soil. My hope is that the roots of the peas will descend into the larger pipe tricking the plant into growing larger then the small pipe would normally allow. You see plants are smart enough to only grow as big above the soil as there roots are below the soil. I’ve tried a very similar setup with lettuce and although it works, the lettuce only grows about 2 inches tall.

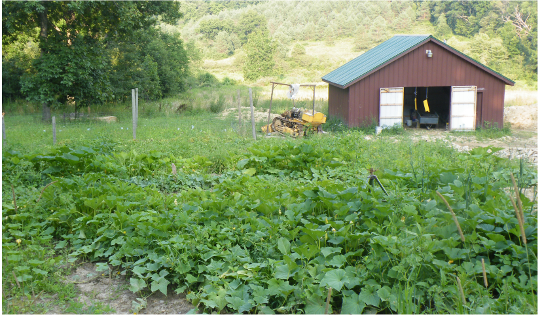
My panic has long since subdued, but there has been a noteworthy side effect: 7 gardens have been partially or fully stocked with the plants shown. Now I just need to figure out what to do with the other plants that are leftover… and so I have a new panic, 7 gardens full, and I still have half my plants left. This should be interesting…

Posted in Uncategorized | Leave a comment

50% Shade Hoop House

Initial Setup

This year I hope to take a much harder swing at propagating cuttings, and to scale up my efforts, I’m bringing back the bones of the old hoop house I originally constructed 6 years ago. I’ll modify the design to provide shading from the sun rather than protection from cold. Instead of a clear plastic cover, I’ll use 50% shade cloth.

I had stored all of these water pipes in a bundle tucked into the corner of a shed, and when I pulled them out I had only minimal damage. A quick trip to the big box store with a mask over my face and I soon had all the parts I needed in my gloved hand.

I asked my wife, Kassy for help, and I was surprised how quick we got the basic structure in place. The frame consists of Schedule 40 1/2″ piping, so the first step was gluing them all together. After that, we secured them to a treated 2×4 with exterior screws. I should note the original iteration of the design lacked glue, and I believe that was one of the shortcomings of the design.

The raising of the hoop worked out better than I initially hooped. I asked Kassy to hold her foot down on one of the 2x4s while I picked up the center. I was able to slip between the pipes as I lifted, and when I started to lower it, I noticed it stayed in place really well. I must admit this was a really clever design mistake inherited from the original design. If you look closely at the place where the pipes connect to the 2×4 you will notice that they extend past it. When the structure was raised, they dug into the soil just enough to hold it into place. I really lucked out that time! The original hoop house had a 2×8 at the base, and I just re-used most of the pre-drilled holes.

Basic Hoop Structure + Tin sides

Next up, I added two pieces of tin commonly used on metal roofs. You may be asking why? Well, the shade cloth I bought was 18′ X 12′ and the area I needed to cover was about 20′ x 12′. I also had a hunch that the metal would help stiffen the structure, again thinking about the last version that failed. Before attaching the metal I drove four boards about 3 feet into the ground on each corner.

Shade Cloth installed

The shade cloth was a breeze to add. We used zip ties to hold it in place while deciding what to do for the ends of the building.

The only straight part of the picture is the pole in the center.

I chose the location of this hoop house because it was far out of sight of the house. I thought about leveling the soil with the tractor but I’ve learned all too well what sort of mess that would make. Freshly worked soil turns into a muddy mess that adds pounds of mud to your boots, not something I cared to venture into. I compromised by leaving the building on a fairly decent slope, which is only terribly noticeable when I leveled the support shown above.

I settled on using a tarp to block sunlight on the edges, and initially, I just folded over the excess so I could re-use the tarps later. After considering the number of snakes that we see in the yard and imagining how much they would love to hang out in a folded over tarp, I opted to trim off the excess!

Front side with a tarp door.

So there it is, a 50% shaded hoop house. In June I’ll stock this with hundreds, perhaps thousands of cuttings ranging from elderberries and blueberries to rhododendrons and azalea. I’ve already begun running water lines, and I have an automated sprinkling system that will be added next.

Two rhododendrons from last year’s cutting trials

After finishing the hoop house, I decided to check on last year’s trails. I was having good luck till nearly the end of last summer when I thought all of my cuttings had died. I was quite surprised to see growth this spring on 14 of the cuttings even after I had given up on them!

Posted in Uncategorized | Leave a comment

Etsy Store Closed

Lots of folding wine table prepared for the 2017 Christmas rush.

Well, That was an adventure. I built, sold and shipped over 400 wine tables of various design all around the world within about three years time 5/2015- 7/2018. I have learned a lot and ultimately closed my Etsy shop so I could actually do something other than work. You see it’s not easy to work full time and run a business after work. I missed my life and my garden. So what now ? Well, with the world as it is, quarantine and COVID-19, perhaps its time to go back to the garden, pick up some old hobbies and get back to blogging!

I just love my Nanking cherry bushes, and with a heavy frost due, I thought I should try an experiment. I covered most of the bushes with a tarp and left a few flowers exposed. Just as I thought; It appears the exposed flowers (on the bottom) might be damaged, and therefore are unlikely to produce the cherries I love. The flowers on the top look unscathed. I guess only time will tell if covering them makes a difference. I’ll keep you posted on that later.

Second seeded row.

A few weeks ago, I planted some broccoli, swish chard, pak-choi, and spinach. I was worried that the little seedlings would suffer from the frost, but they look pretty good this morning.

Another project in the works, a 50% shade hoop house

I have yet another project in the works, a 50% shade hoop house. If you scroll down far enough you’ll see the original hoop house I made six years ago. It ultimately was knocked over by the wind, and at that time I had just met my soon to be wife, so the hoop house took a back seat.

I saved the “bones” of the hoop house, and I’m reusing them now. This iteration is meant for propagation – the cloning of plants from cuttings. Here I hope to continue my experiments rooting new plants including blueberries, Nan-king cherries, and many flowering bushes. I’m sure I’ll touch on that again later this year.

David Brown 885

I have lots of other items to fill in the gap I’ve left here, from about 2015 to 2020, lots of changes, lots of growth, and plenty of tough projects. I’ll “dig” into the David Brown 885 later, but here’s a hint: I rebuilt that diesel engine and if that wasn’t enough self-punishment, I rebuilt the transmission too.

Posted in Uncategorized | Leave a comment

Etsy Store Open

Wine Bottle and Glass Stand

Wine Bottle and Glass Stand

After much discussion between Kassy, Nate and myself, I’ve finally opened an Etsy shop to sell the products of my second favorite hobby: Woodworking. Above, you can see my third item for sale, a wine bottle and glass holder for outdoor use. It will hold one 750ml bottle, and two wine glasses.

At this point, I’m keeping my expectations as grounded as possible, but wouldn’t it be great if this shop turned a profit, or even generated enough revenue to buy more tools ?

You can visit my etsy shop “NWPABackwoods” by clicking here: https://www.etsy.com/shop/NWPABackwoods?ref=hdr_shop_menu 

Thanks !

Just in case your wondering, my favorite hobby is playing in the dirt, whether it be on the dozer, or planting tomatoes. =)

Posted in Uncategorized | Leave a comment

Recipe for Grape Jam.

Concord Grape Jam

Concord Grape Jam

A few years ago, I planted 12 different types of grapes on the farm, including many plants that I cloned. This year I’ve finally started to taste the rewards of that effort, in the form of Grape Jam.

Kassy and I started the weekend by picking mostly Concord, with Canadice and White Niagara grapes, then we found and altered a recipe for making jam. The original recipe was good, but it delivered quite the punch to the senses when eaten, and we both agreed the recipe had way too much sugar. So, I’ll get straight to our revised recipe, and I hope you have just as much fun making this as we did !

Grape Jam

You will need: 

4 cups of processed grapes ( as indicated below )
2/3 cup water
2/3 of a box of Sure-Jell
1/4 teaspoon butter
3 1/2 cups sugar

First process the grapes by removing the seeds and pulp from the skins. Place the skins in one dish, and the pits and pulp in another. Place the skins in a blender and chop until all chunks have been pulverized. Set aside.

Mix grape pulp and seeds with water in a saucepan & boil. Reduce to low heat, cover and simmer for 5 minutes.

Remove the saucepan from heat, and strain out seeds. Combine pulp with pulverized skins, measure 6 cups and place in a saucepan. Stir in Pectin & butter. Bring to a full rolling boil on high heat, stirring constantly.

Stir in sugar & return to a boil for 1 minute. Stir constantly.

If foam develops, remove with a metal spatula.

To can for storage:

Place jam in canning jars. Be sure the top of the jars are not defective, and that their is no jam on the lid. Place the lids on snugly, but not overly tight, then place jars into a pot of water. The water should cover just over 3/4 or the jar, but not submerge it. Place the heat on high, and bring to a rolling boil. Boil for 5 minutes, then carefully remove jars from water. Tighten lids if needed.

The jars should be set somewhere where they will be undisturbed overnight. You should hear the tops of the jars click when they seal. It could take five minutes, or five hours for them to seal. When properly sealed, the center of the lid should be caved in, downward. If they do not seal, try a new jar, and restart the canning process.

Next up: Apple Jam !

Posted in Grapes, Recipes | 1 Comment

Rainy Cool Summer

Garden and Dozer

Garden and Dozer

It’s been an unseasonable cool summer, with what seems like twice the normal amount of rain. I’ve only had to water the garden in the first few weeks after it was planted, and I haven’t touched it since.  The crops are still doing very well for the most part. Thankfully this new garden area is on a decent slope, just like all my others have been.

Waltham Butternut

Waltham Butternut

I managed to dump two large dump truck loads of manure on the top end of the garden, and I spread it out fairly well with the tractor. Unfortunately when you dump an entire truck load in one spot, it compacts the manure at the bottom and it was quite difficult to spread that last six inches or so of fertilizer. In this area, I planted my winter squashes: Waltham Butternut, Acorn, Spaghetti and new for me this year: Bush Squash.

Endless Zucchini

Endless Zucchini

I had started about five zucchini plants in the greenhouse, and planted an entire row nearby from seeds. Nearly 50 plants emerged from the soil, and many of them have began full on zucchini production. I don’t think it needs to be written, but I will be buried under piles of green goodness in a few short weeks time.

Another great crop this year has been the cucumbers. I’ve planted a mixture of seeds from previous years, and three types seem to be doing quite well. Straight 8, Boston Pickling and another strange elongated variety have produced nearly four shopping bags of cucumbers. What a great year for Mother to be making pickles, as I usually round up the cucumbers and drop them off for Mom to can them.

Tomatoes haven’t done as well this year as in the past, but their short stature hasn’t stopped them from going into full on production. I will have way too many tomatoes again this year. I blame the copious amounts of blue water that I spread over them while applying anti-blight spray.  (The water is colored blue by the Miracle Grow plant food I use).

OC-3 IXK-3Hercules Engine Out

OC-3 IXK-3Hercules Engine Out

This year my focus is once again on machinery, and pushing myself out of my own comfort zone. You see this dozer has been a great piece of machinery that I’ve accomplished a good amount of work with, but one day the engine started making a serious and steady banging sound. It had to be removed and repaired before the entire engine became unusable.

Once again, I turned to my friend Shayne to guide me through the process. I’ve worked on engines a few times in the past, but it’s not something that comes second nature to me. With George and Shayne’s serious help, we removed the engine, and determined that the Rod Bearings were the cause of the noise, and they had to be replaced. If your ever in the same boat, go ahead and buy a micrometer and measure the crankshaft before ordering new bearings.  The cost of the micrometer will surely offset the amount of postage you may incur in sending back the wrong bearings as I have learned.

CrankShaft

CrankShaft

One more thing I’ve learned is that some earlier OC-3 Hercules IXK-3 engines have poured in bearings made of a soft metal. The problem with these bearings is that they wont just snap out like newer bearings, so I had to purchase new connecting rods. It seems the use of these cast bearings was changed part way through the production of these dozers, starting with the newer style bearings being used after serial number 1285102. If it was only the rod bearings I would have been long done with this project, but replacing the rod itself requires removing the head from the engine.

Pistons

Pistons

Once I pulled the head off, I noticed one more problem. Take a look at those pistons ! Even a career computer guy like me knows all that black build up is not good for the engine. It will have to be cleaned off before I put the old girl back together.

All in all, it’s been a great experience. I’ve learned so much from this dozer, and now I can add dozer engine repair to my resume. I now feel much more comfortable with engines and mechanics, and I hope to put this puzzle back together this Friday. Let’s hope there are no more hitches along the way !


Posted in Uncategorized | 1 Comment

Hoop House Trials

Base Frame and Ends

Base Frame and Ends

I’ve been meaning to take cool weather veggies more seriously for several years now. I’ve never had much luck with the likes of broccoli, cauliflower and cabbage, and thought there might be an issue with my timing. I was also interested in extending the growing season in the spring and fall, so I decided somewhere in the depths of the miserable winter of 2013-2014 to construct a hoop house.

All Hoops Up

All Hoops Up

I found a blog post online which included plans for a 50 dollar hoop house: http://doorgarden.com/10/50-dollar-hoop-house-green-house  I didn’t follow their plans exactly, and modified it to suit my own purposes and the building materials I had on hand.

I made the base out of treated 2 x 10’s, nailing them together on the ends. If I could do this again, I would use screws or bolts to fasten the boards, and even add posts on the corners, to anchor the building. I used some old trim boards to create the end caps, leaving a door area open on the front end.

Plastic Covering On

Plastic Covering On

The plastic was quite a bit more expensive then I imagined, coming in at $80 + shipping, but it’s very thick plastic, and it’s what the “professionals” use. I managed to cover the ends with a much cheaper drop cloth type plastic used by painters. Since this end wont have to carry the weight of the snow, it should be just fine.

Under The Plastic

Under The Plastic

By the start of February, I had the hoop house covered, and ready to plant, with one exception: I had to wait for the soil to thaw. This winter was particularly cold, reaching as low as -15 when the wind chill was factored in.

First Trial Planting

First Trial Planting

While I was waiting for the soil to thaw, I placed two bags of potting soil in the hoop house, and planted chard, spinach and lettuce. Rather then spread the soil on the ground, I simply cut the top off the bag, and poked some holes through the bags base. This would allow excess water to drain, but at the same time act as a weed barrier.

All Seeds In

All Seeds In

So what have I learned from all this work ? The middle of March seems to be a good time to plant spinach, lettuce, carrots, onions, and radishes. Swiss Chard didn’t seem to do well, but eventually did grow. I planted broccoli, cauliflower, pak choi, peas, endive and escarole a few weeks later, and all are doing great.

I’ve also learned a thing or two about hoop house construction. You see we had some extreme winds, and the building took a serious beating. I came home from work to find it all but flattened, and nearly blown away. To counter the winds, I will actually glue the pvc pipes together next time, and also sink end posts a few feet into the ground to resist wind damage.

The plastic worked very well, even in the high winds, but I also need to think about an automatic heat venting system for sunny days.

I’ve since transplanted all of the broccoli out into the much bigger garden, and plan to do so with the cauliflower as well.


Posted in Uncategorized | Leave a comment

Oliver OC-3 Dozer

1951 Oliver OC-3 Dozer

1951 Oliver OC-3 Dozer

This summer I acquired a small, antique bull-dozer. I didn’t have any use in mind for it, but the prices was too good to pass up. The first day I drove it was quite an education. For one, there are two directional handles rather then a steering wheel, and curiously, this machine had two shifters.

Controls seen from the Hot Seat

Controls seen from the Hot Seat

After I figured out the gear pattern, I drew a guide onto the hood with permanent markers. The left hand shifter is in the center, the the right hand shifter is blue. I also made a reminder to turn the gas off. This dozer has quite a bit in common with a 8n ford tractor, and one of those things is the “gas ball”, which tends to leak if it’s not turned off.

Magneto, with off switch

Magneto, with off switch

Another point of education was the way in which the crawler is turned off. You see, there is no key switch, and no off button to be found anywhere, until my brother showed be the button on the magneto. Once pressed, the engine will turn off immediately, which was a lot easier then trying to stall out the engine.

Final Drive Connection to Differential

Final Drive Connection to Differential

The initial education paled in comparison to the lesson this dozer would give me about mechanics. One day while grading some soil in the backyard, I noticed a bolt sitting on the ground. I panicked, and after following a bit of spilled oil, I found where the bolt should be located. You see the dozer must have given the previous owner lots of trouble, and most of the bolts connecting the final drive to the differential were stripped out, and barely holding the pieces together.

At first I believed the machine was lost until I talked to my buddy Shane. He advised that this would be a fairly simple fix if the right tools were used. I soon learned that a bolt could be used as a make-shift tap, to re-tread the bolt holes in the differential.

To use a bolt as a tap: Cut a long groove into the side of the bolt, and slowly turn the bolt into the hole which needs new threads. For every three turns forward, turn once backwards to catch any metal fillings. A bolt will only tap one or two holes, but that’s far easier then purchasing a tap set.

To really hold the bolts in place, we added nuts and lock washers on the inside of the differential. I couldn’t believe it worked so well.

New Starter

New Starter

The previous owner (a battery sales company) informed me that the alternator pulley was too small, and that was why the battery was always dead, so I had been jump starting it from a 12-volt battery while I found a replacement pulley. While the jump start process worked, it had an unintended consequence. Apparently, when you hook up a 12-volt battery to the 6-volt starter, the starter coils inside will fly out of place, and become snagged in the outer walls of the starter, making it useless. That’s when I discovered how rare starters can be for an OC-3. I finally tracked one down at Zimmerman Oliver-Cletrac (1-717-738-2573, www.olivercletrac.com )

I also figured out that the battery was bad, and the alternator pulley was just fine. I guess people who work at a battery shop wouldn’t know to look for this. Once the battery was replaced, that machine stopped stalling, and I haven’t jump started it since.

Tearing It Up, Leveling it out

Tearing It Up, Leveling it out

After all the work, and lot’s of learning, the dozer is now one of my favorite toys. I’ve been using it to flatten out my yard, between my porch, and the now nearly finished shop. I’m about half-way done, and should be ready to re-seed it before spring.

Posted in Uncategorized | Tagged , , , , , | Leave a comment

Busy Building

When I Moved In

When I Moved In

When I moved into my new home, I had a half completed project waiting for me in the background. This structure was originally intended to be a horse barn, but I’m not the type who enjoys feeding animals everyday nor do I enjoy making or stacking hay in the hot summer. So, I’ve decided to finish the building for use as a shed.

Good Roof

Good Roof

The shed already had a roof. I was one of the people who climbed up to the top to hold and screw the tin in place, so I already had a bit of time invested. There was just one problem with the whole project.

Bad Posts

Bad Posts

The posts that were sunk into the ground to bear the weight of the roof hadn’t been sunk far enough into the ground, and the posts were untreated rough cut 4x4s. If I was going to finish this building, and do it right, I decided better posts would be needed.

Added Posts

Added Posts

With the help of my brother George and our friend Shayne, we managed to install new 4×6 weather treaded posts next to the original posts. We also made sure the bury the posts 36 inches deep to prevent the frost from lifting the posts up out of the soil. The next step was to wrap the building with 1 x 6 boards, which will hold up the tin walls.

Barn w Bull Dozer

Barn w Bull Dozer

So here’s where we are at as I begin preparing for winter. The shed is almost enclosed in tin, and the beginnings of a drive way to the building is taking shape.

Like any project, things don’t always go as planned. The bull-dozer which moved all of the top soil out of the way is now in need of serious repair, and should not be moved until then. These repairs should be possible, but until then, I’ll have to work around this machine.

Posted in Building and Construction, Tools, Uncategorized | Leave a comment

“A Normal Garden”

Normal Garden

Normal Garden

After years of telling myself to cut back, I’ve finally managed to plant a much smaller, much more “normal” sized garden. It’s amazingly simple to maintain, and I only have to move the sprinkler once per watering to cover all of my plants. I’d guess the whole plot is about 15 x 40.

Muncher - Cucumbers

Muncher - Cucumbers

This year I’m trying new types of cucumbers called “Munchers”. There are extremely crisp, and if enough grow they will make great pickles.

BlueBerries

BlueBerries

With all of the time I’ve saving with a smaller garden, I’ve managed to plant 32 blue-berry bushes in the yard next to the garden. I got them at a bargain basement price from my brother since he thought they had all died. At the time I thought I might get lucky and be able to save 5 or so; but they all surprised me after a few weeks in the greenhouse.

New Flooring

New Flooring

I’ve even saved enough time not sweating in the garden to put down this nice laminate flooring. I guess I’ve finally learned that there is no point toiling endlessly growing hundreds of tomatoes for people who aren’t thankful when they consume the efforts of my work.  I’m spending more time working on things to make my life rewarding, rather then providing a free ride for someone else.

But I should be more forthcoming. I still plowed under two long rows in the old garden, and planted over a hundred tomato plants. I’ve spaced the rows far enough apart to easily mow between them. Why ? I don’t know.  I guess there are still enough people who are thankful to make the work rewarding.


Posted in Blueberries, Muncher, Tomatoes | Tagged , , | 2 Comments