Towering Tomatoes & Number5

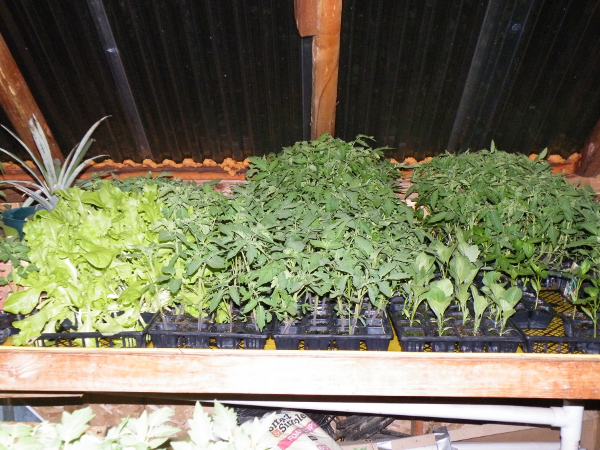
Last Tomatoes Planted - Roma

Last Tomatoes Planted - Roma

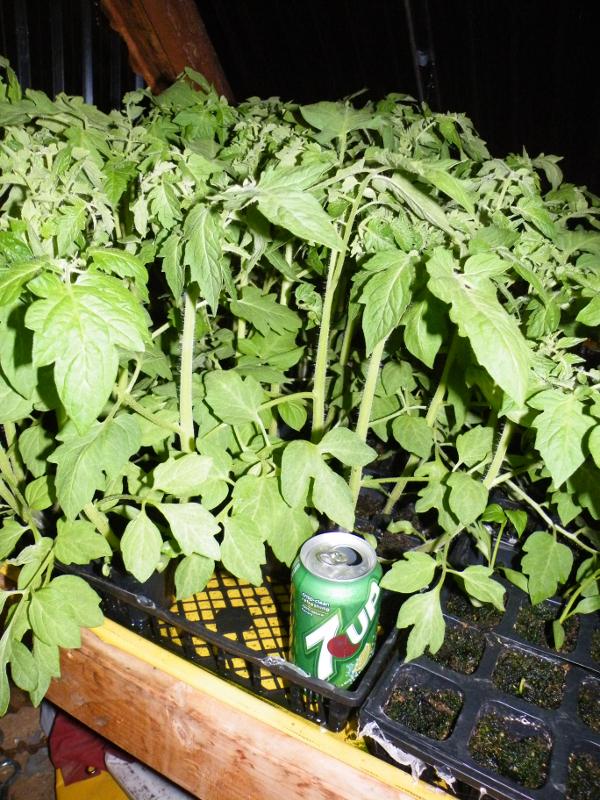
I’ve been starting tomatoes in my greenhouse for several years now, but I’ve just now learned something new: If you start tomatoes too early, it seems to stunt their growth. The tomatoes above were the last that I planted, and yet they tower above the plants I started first. The unfortunate part of this lesson is that I didn’t keep track of when I planted them.

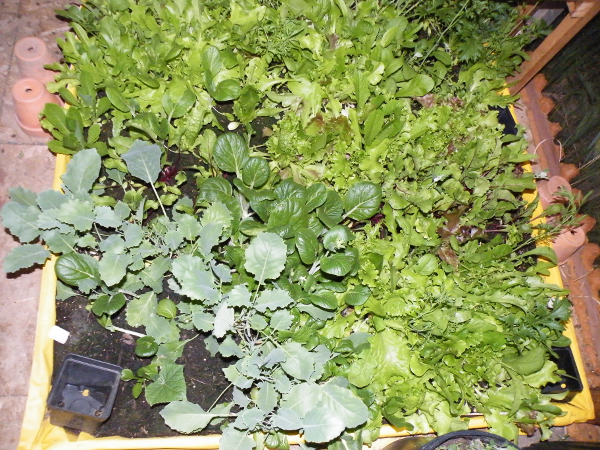
Lettuce,Tomato, Eggplant

Lettuce,Tomato, Eggplant

The tomatoes, lettuce and even eggplant are doing great. My peppers are a bit short this year, but I still have two weeks before my planting vacation. I think they will be ready by then.

Indoor Garden

Indoor Garden

The indoor test garden is doing Great ! This may drastically change the way I plant lettuce and other greens. The plants are largely protected from animals, although I did have one instance of animal damage. I left the greenhouse door open and a salad loving critter decided to enter the building for an all it could eat buffet. The plants quickly rebounded and I’ve constructed a small wall to keep animals out.

Number Five

Number Five

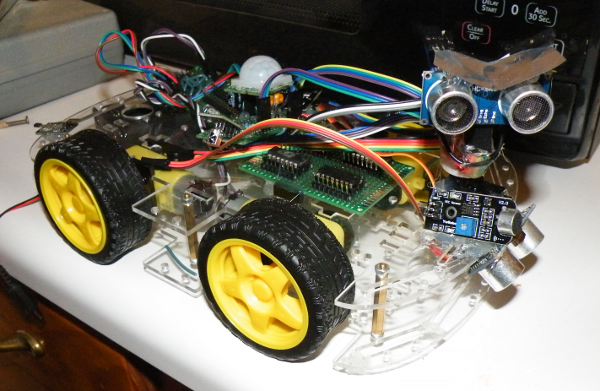
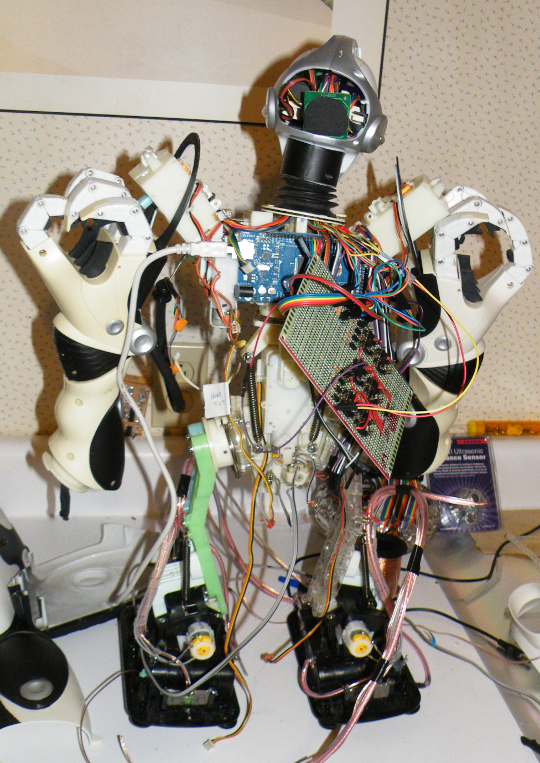
I’ve decided to take a break from my last robot project and work on a wheeled bot. The wheels are far easier to maneuver with, allowing me to focus more of my work towards artificial intelligence, and less effort trying to teach a robot how to walk.  “Number Five” will have 4 wheel drive, and multiple sensors which will modify his behavior. For example, the bot will drive slower at night, and fastest when in full light. I also hope to make the robot shy away from magnetic fields, and wake up when sounds or motion are noticed.

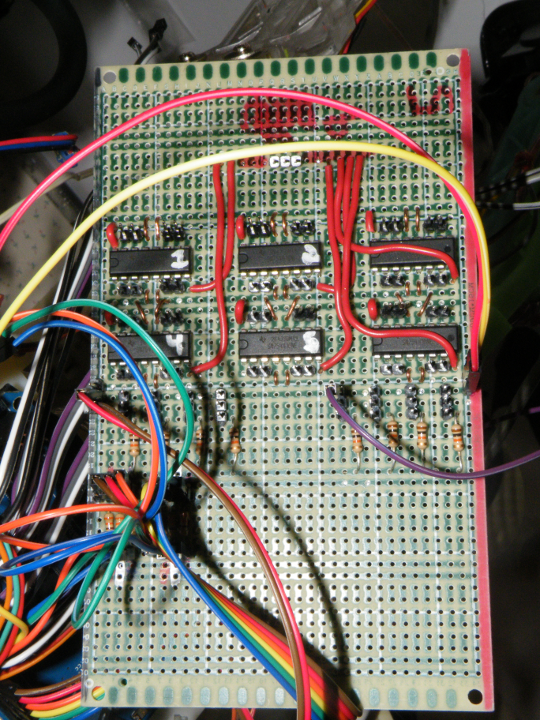
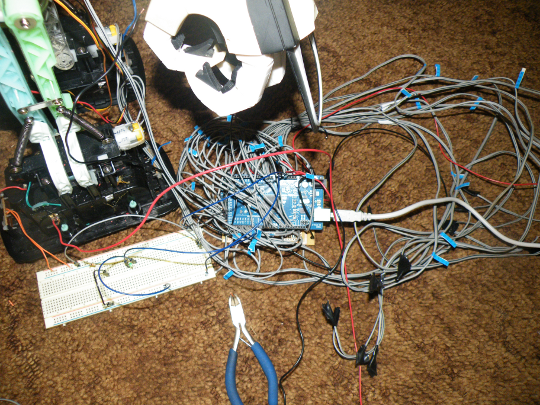
I’ve made myself a AtTiny84/85 chip programmer that attaches to my Arduino Mega board. I’ll use the programmer to transfer all of this bot’s code to three AtTiny84 chips (you can see them on the green board in the center).  The robot will then be operated  solely by these three chips.

Posted in Arduino Projects, Greenhouse, Technology, Tomatoes | Tagged , , , , | Leave a comment

Trays All In

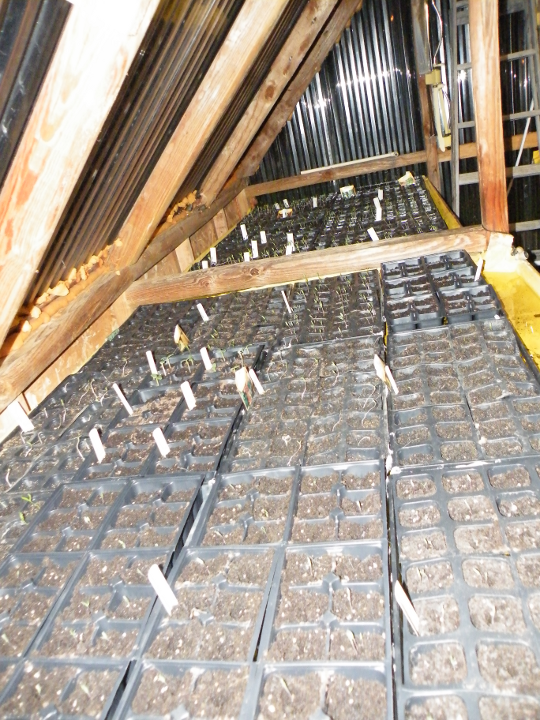
Two Tables Full

Two Tables Full

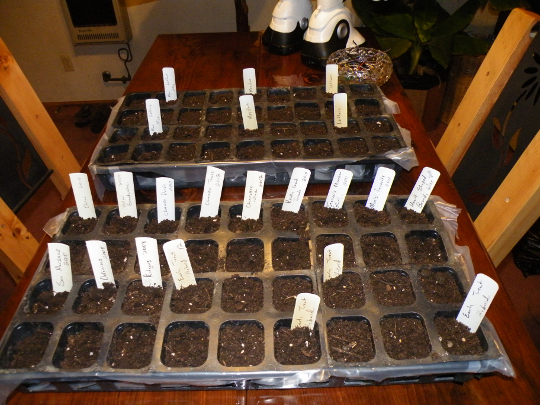
This year I managed to get all of my tomato and pepper seeds started at roughly the same time. I started all of these trays in my home during the germination stage, and they were placed around every available window. A few trays didn’t receive nearly enough light, and when they were moved out the greenhouse the brittle plants didn’t make it. I figure about 40 plants suffered this fate, so all in all, it wasn’t a bad start. Now that these little plants are in the full view of the sun, they won’t stay small for long !

Garden In the Greenhouse

Garden In the Greenhouse

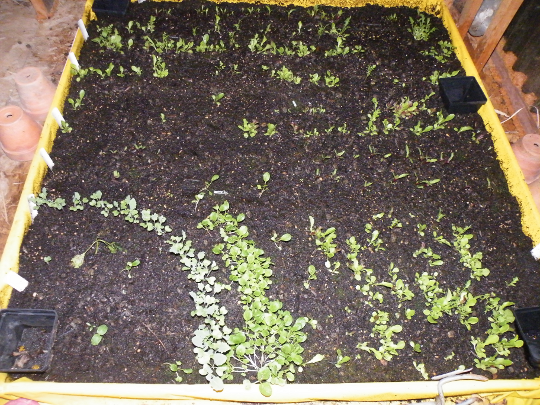
This spring I’m adding a new method to gardening, growing entirely in the greenhouse from seed to harvest. The idea began as a way to grow lettuce quicker, but once I realized ground hogs, deer and rabbits would be unable to eat my plants, I decided I had to give it a try. I purchased the largest bag of Miracle Grow Potting soil I could find, and filled a square  box with it. I then planted Swiss Chard, lettuce, mesclun, kohlrabi, pak-choi, beets and a cucumber seed in the soil. They seem to be doing very well so far.

Greenhouse at Night

Greenhouse at Night

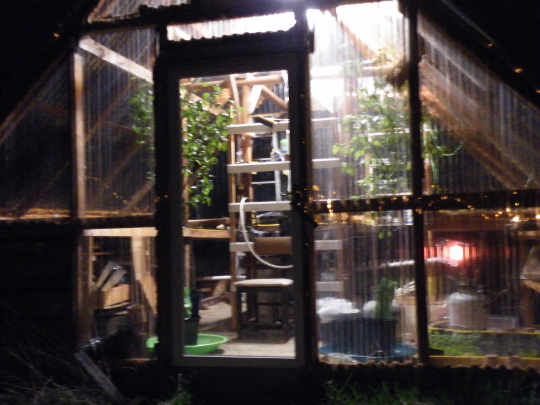
I even have two large fruit trees inside. They were too tall for any standard home’s ceiling, and it’s a bit too cold to plant them outside. To keep them watered, I re-purposed some sleds and filled them up with water.


Posted in Fruit Trees, Peppers, Seedlings, Tomatoes | Tagged , | Leave a comment

Tomato Trials, Winter Wrap-Up

Three Hobbies

Three Hobbies

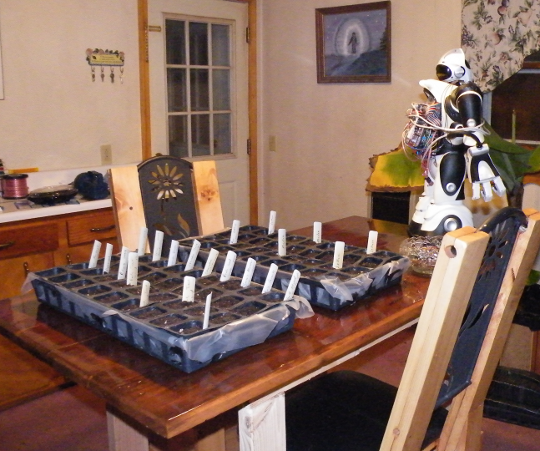
The winter blues finally got the best of me, and so I gave in, and started planting seeds early. I told myself I was doing a tomato trial of sorts, rounding up seeds from years past and plugging them into the soil. I carefully marked each seed type, from my experimental Cherokee Wine and Cherokee Tears through Red Lightning and Yellow Brandy-wine. I also   planted three different types of greens.

Tomato Seeds

Tomato Seeds

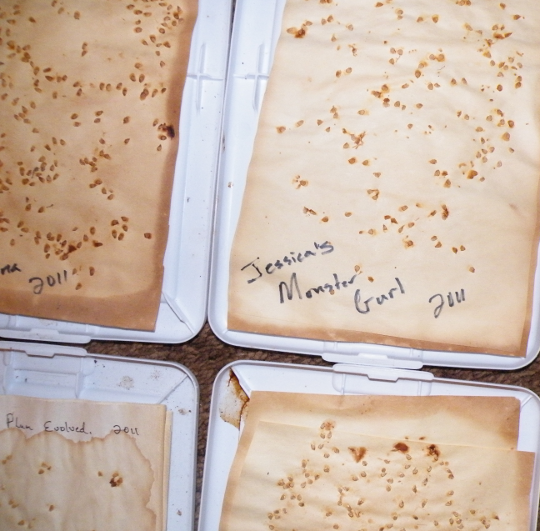
This whole project started when I discovered several trays of saved seeds in the greenhouse. I was pretty happy to discover some seeds marked “Jessica’s Monster Gurl”. These are  seeds I harvested from a heritage tomato passed down from my nieces Great- Grandmother. These were the last traces of this line, and I had thought I lost them forever.

Tomato Trials

Tomato Trials

Once I was finished with my planting, I noticed the irony of my work. Here on this table were three hobbies, each varying considerably from each other. I’ve been working on the table for the better part of this winter, while waiting for parts for my robot project.

Ike, Re-Constructed

Ike, Re-Constructed

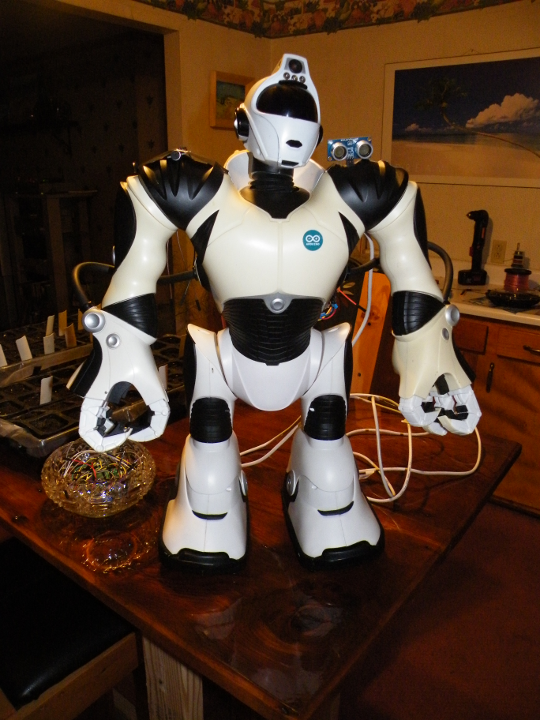
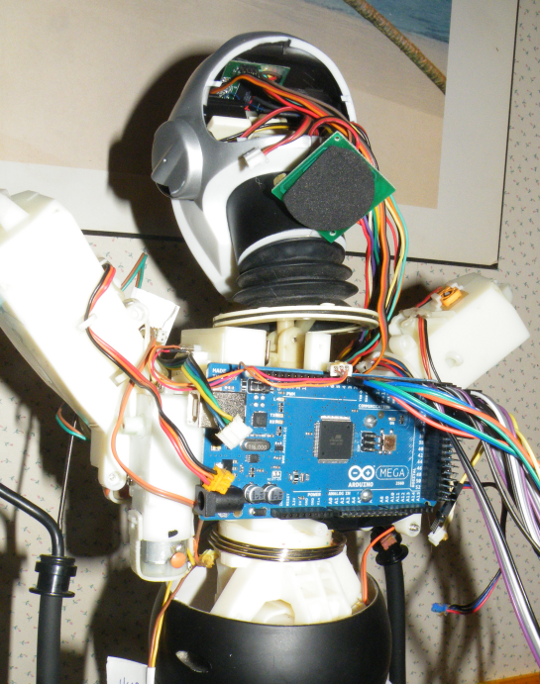
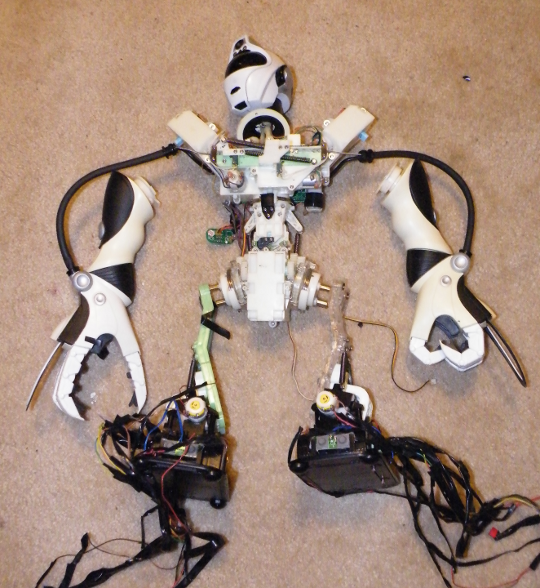
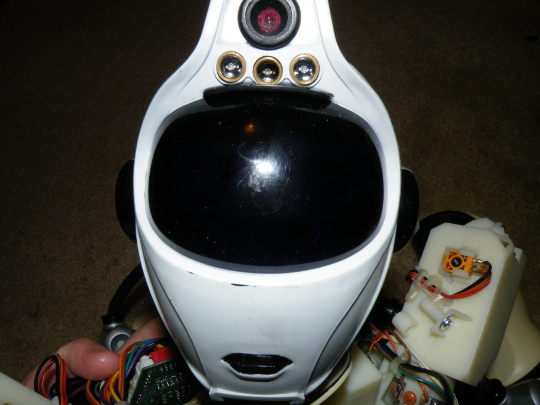
Ike is finally back together, with some additional parts located on his shoulder. He now has an Ultra-Sonic distance sensor on his left shoulder, and a sound sensor on his right. I’m wrapping up his new wiring tests, but so far things are looking great. I’ve programmed him to be a bit shy, with calm blue eyes until you cramp his space, in which case they slowly changed to red eyes.

Weathered Boards

Weathered Boards

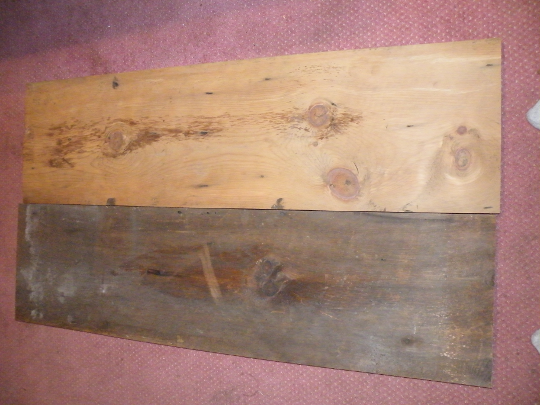
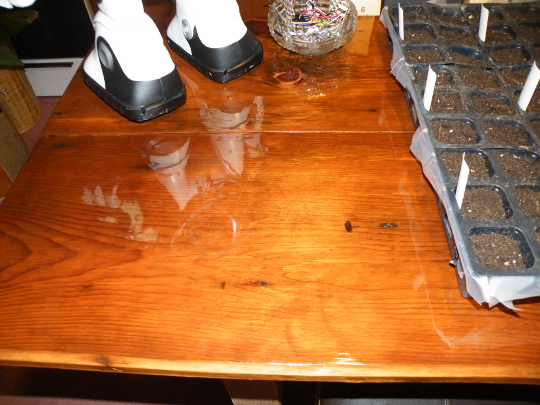
The table was comprised of one very long and wide board I found in a shed, exposed to the rain and weather for years. The wood had a rough-cut texture, which was dulled to a gray by the rain.

I cut this board into two equal pieces, and began sanding it. The board above shows the wood after a significant rough belt sanding. The dust smelled like cedar as I sanded, but the grain lacks significant detail, so I’m unsure what wood it could be.

Weather Detail

Weather Detail

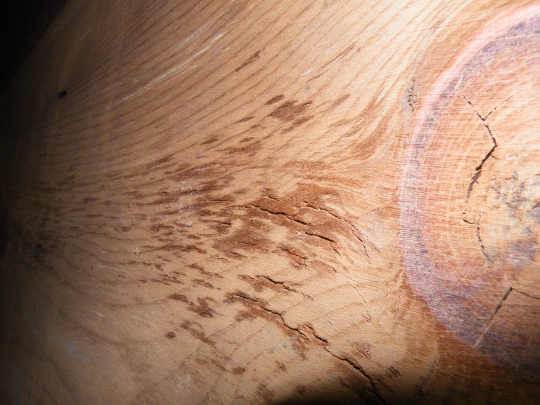
The board was also weathered to the point were it began to dry rot in places. When sanded down, this added character, and I was hoping Polyurethane would fill in the spaces nicely.

Table from Weathered Boards

Table from Weathered Boards

I had no idea how well it would turn out. I used a mix of Cherry stain with a bit of Walnut, and some Mineral Spirits to really pop out the grain. Next time, I’ll be sure to stain first with Birch, then Cherry with a hint of Walnut. The different colors seem to soak into the different grain densities causing a very attractive finish.

Posted in Arduino Projects, Building and Construction, Ike, Tomatoes | Tagged , , , , , , , | Leave a comment

Ike’s Upgrades

Arduino Mega Board Mounted on Ikes Back

Arduino Mega Board Mounted on Ike's Back

I’ve been working on Ike, my toy robot project for awhile now, and I’ve made some serious progress. What once started as a concept is starting to really show itself as a reality. The Arduino board I once imagined controlling this bot is now securely fastened to his back. All of the pins that supply output and input to drive this contraption have been mapped, and the real work of putting him back together is beginning.

Motor Control and Wire Distribution Board

Motor Control and Wire Distribution Board

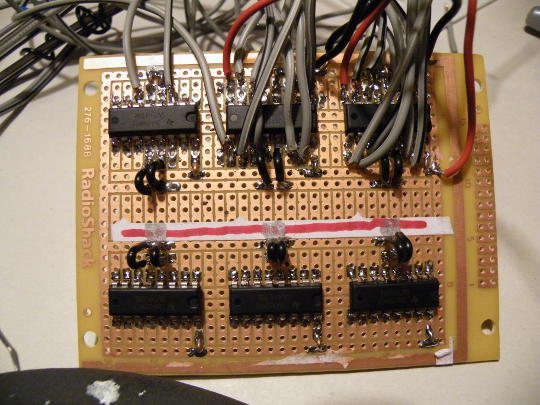
The Arduino board itself is quite impressive, but it’s not a robot control solution in it’s self. The board still requires the help of some additional circuits, and additional power. The motors that drive Ike’s movements use 9 Volts, and both wires need current at different times. To solve this dilemma, I’ve added H-Bridges, that convert the Arduino’s output into 9 Volts on the required wire. This allows the motors to more forward or back as needed.

Below the H-Bridge cluster is a series of connectors and resistors which will enable some of Ike’s sensors, and under that,  the row of resistors is an area dedicated to powering Ike’s new multi-colored eyes. He originally had only blue eyes, but now his eyes can range wildly from blue to red to white. The LEDs are also capable of green, but Ike’s visor filters most of this light out, and it appears a dull gray instead.

New Wires on Ike's Foot

New Wires on Ike's Foot

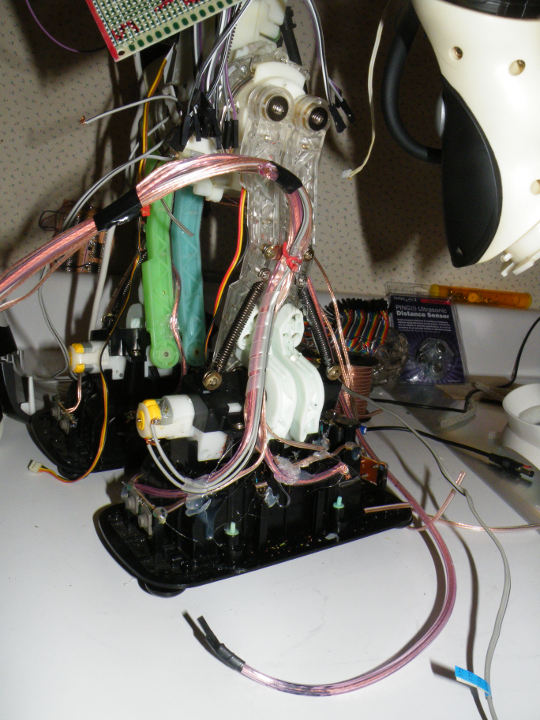
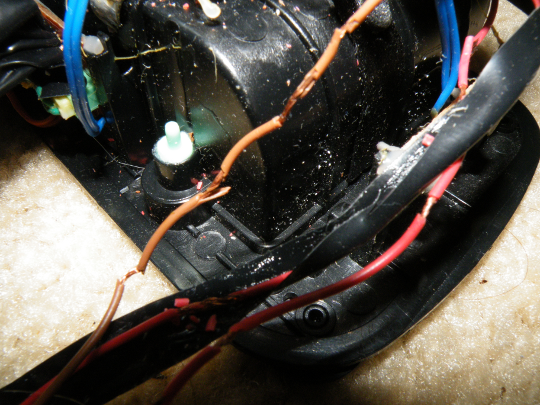
In addition to Ike’s new eyes, and control boards, I’m re-wiring every component. In place of the thin wires that didn’t last, I’m putting some seriously thick wire where needed. I found this ridiculously thick speaker wire which was meant to power those thumping stereos in the younger generation’s cars. It should definitely do the trick, and last for quite a while as well.

Testing the Multi-color LED upgrade

Testing the Multi-color LED upgrade

Here’s an exploded view of sorts, which shows how the two boards will be stacked. The Arduino board will be about an inch below the new motor control board. The second board will be integrated into Ike’s exoskeleton. I’ve had to cut a big chunk out of his backs plastic to mount this board.

I’ve been considering adding a third Raspberry PI board on top of the Motor control board…… but, I better finish this stage first. If I do add this third board, Ike won’t require a USB connection, and I should be able to add in Voice Recognition.

The Rats Nest

The Rats Nest

All in all, I’ve made a lot of progress. This robot is more then just a toy, it’s a method to force myself to learn something I’ve always wanted to know: How to wire electronics. I’ve long ago mastered the methodology of computers, but electronics has always eluded me. It was always something I was planning to do in the future.

The future is now, and I’ve learned far more then I thought I would from this project.  When I finished soldering Ike’s motor control board, I realized I could use the same methods modified just a bit to build robots that build walls…. Just as a car factory uses robots to build cars.

Posted in Arduino Projects, Ike | Tagged , , , , | Leave a comment

Pruning and Soldering

Vines Before Pruning

Vines Before Pruning

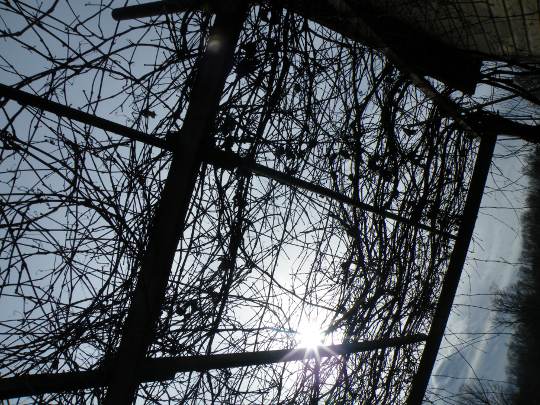
The last few days have been bitterly cold, but before that, our winter was fairly warm. Since it has been cold enough to put the plants into a winter slumber, I’ve been pruning them on warm days. The grape vine above needed a great deal of care, as I didn’t prune it back as much last year as I should have. This year, I’ve decided to do it right.

Vines After Pruning

Vines After Pruning

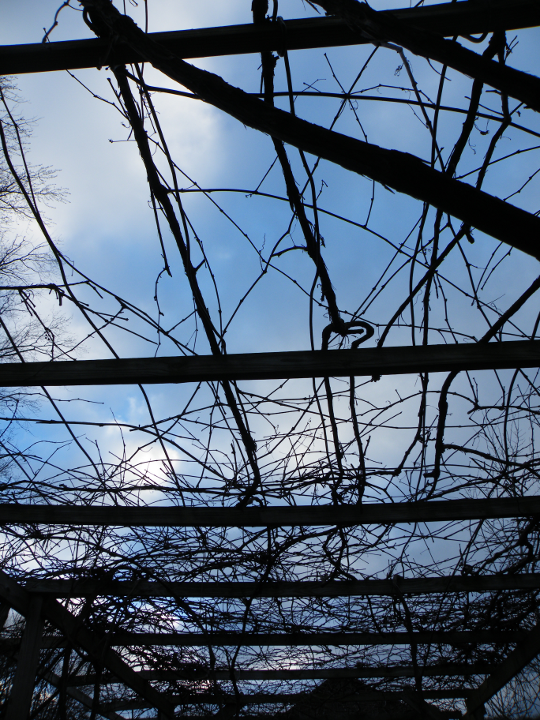
I started at the roots of the plants, and followed the vines as they split. I cut off most of the runners, except for the more desirable ones. Most of the vines would double back over themselves, climb up the shed nearby, or grow back towards the ground.  These vines were cut, and only the vines that grew towards the other end of the trellis were left. I plan to cut them back even more next year, but first I want to make sure I get the outcome I’m looking for, before I turn this trellis into a holder for only four vines.

Ike's New Motor Control Board

Ike's New Motor Control Board

At night, when the sun is no longer available to help with pruning, I’ve been pruning wires. It all feels like the same activity anymore, especially when we just finished re-wiring the network at work. We ran 7000 feet of cabling, and with pruning grape vines, and cutting wires, I’ve spent a lot of time chasing ends.

The board shown above is Ike’s motor control board (Ike is a robot project I’ve been working on). I got started before reading the directions, and the board itself is upside down. oops. The circuits still function, but they aren’t quite as neat as they should be.

The black boxes will convert signals from an Arduino board (not shown) into 9 volt outputs to drive Ike’s motors.

Ike's Motor Control Board Soldered

Ike's Motor Control Board Soldered

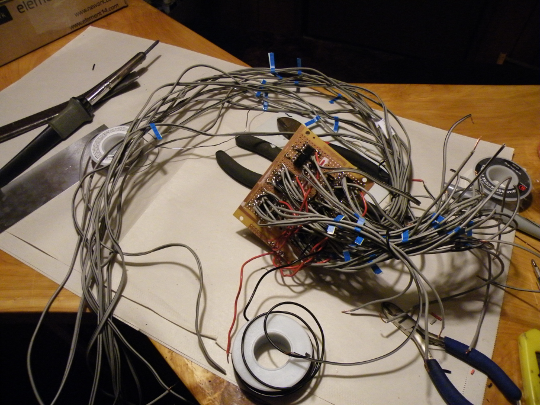
Here’s the same board after a good deal of time was spent cutting and soldering wires. I’ve used blue stickers to number each of the wires. The short wires will connect to the Arduino board, and the long wires will connect to Ike’s motors and eyes.

Ike's Motor Control Board Wired to Arduino For Testing

Ike's Motor Control Board Wired to Arduino For Testing

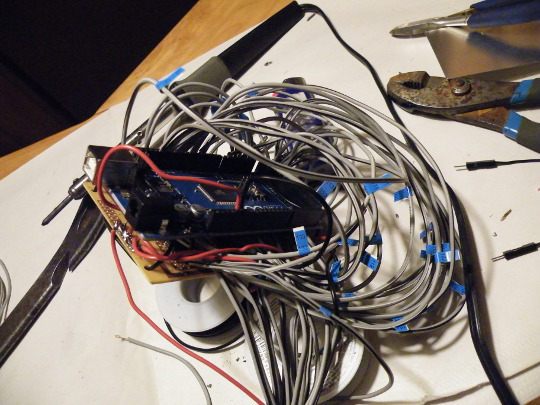
I then used some rigid wire to connect the Arduino board to the top of the Motor control board. The wire will work for testing purposes, but I will need to find a more long term solution to mount both of these boards to Ike’s back.

The Arduino board has a USB connector which I can use to load permanent instructions. The instructions are stored on the board after it is disconnected.

I now need to do some testing to make sure all of the wires are connected properly, and find a better power source.

Ike's Arduino Code

Ike's Arduino Code

Here’s some very basic Arduino code for testing Ike’s walking capabilities.  I plan to write the more basic mechanical functions as code that will be stored on the Arduino board, and then write a more complicated AI/personality program that will drive the basic functions.

It is a very long term project indeed…

Posted in Grapes, Ike, Pruning | Tagged , , , | Leave a comment

Project “Ike”

Ike as He Should Be

Ike as He Should Be

I recently purchased a toy robot from a co-worker. The robot is a RoboSapien V2, produced by Wowwee, but this robot was worn-out, and I purchased him knowing that he would need some serious re-wiring. You can see what he was originally intended to do here: http://www.youtube.com/watch?v=VCGp2EfmnS0  Rick named him “Ike” after “Isaac Asimov”, a famous sci-fi writer, and I thought it was fitting, so I’ve decided he should keep the name.

Ike's Wiring

Ike's Wiring

I took Ike apart, knowing that his wiring had frayed over time. My intention was to repair the wires with some electrical tape, and put him back together. I wasn’t prepared for the number of wires which needed work, and how tedious and time consuming the work would be. After covering many of the wires with electrical tape, I decided the problem needed a new solution.

I decided to re-purpose this well thought out design into a whole new robot, not one which is simply re-wired, but rather re-constructed. I took the robot completely apart and began surveying what could be re-used, and what I would need to replace. The motors all seem to work, as I’ve tested a few of them, and his joints and other mechanical parts all seem functional. What he really needs is a new brain.

Ike - DeConstructed

Ike - DeConstructed

I hope to replace his circuit board with an Arduino, or similar board, which I can connect to a computer. What was once a plan of simple re-wiring has morphed into a project for a full fledged computer nerd, aka  me.

I would like to find a connection method that uses my current understanding of perl, rather then learning a new language. If I can do that, then I’m sure I can give Ike some real personality; even connecting him to the internet and giving him the ability to grow over time.

Too bad his hands aren’t more garden friendly, or I could strap a camera to his back and teach him how to pull weeds out of the garden !

Ike - Up Close

Ike - Up Close

So my hope is that I can write all new computer code to get him moving, as well as build the circuits to connect the Arduino board to his motors and sensors. Needless to say, this may be a long term project, and right now all I have is a box of parts, and a plan.

Posted in Computers & Electronics, Ike | Tagged , , , , | 3 Comments

Restoring Antique Furniture

X Shaped Bar - Finally Finished

X Shaped Bar - Finally Finished

I’ve been working on an X shaped bar for several months now. The whole project was an evolution of ideas, starting with the desire for a more open space. I wanted to rip out the wall between my kitchen and my living room, and replace the structural support the wall provided with a central pillar. After kicking around some ideas about the best way to implement the idea, I settled on an X shape to hold the weight of the roof, with a hollowed out top portion that would become my new kitchen table. What a great way to save space by combining a wall and a table !

The project has taken quite a bit of motivation to complete, but now that I’ve finished all of the wiring, lighting, flooring, trim and bar stools, it’s time to move onto new projects.
Antique Bench Before

Antique Bench Before

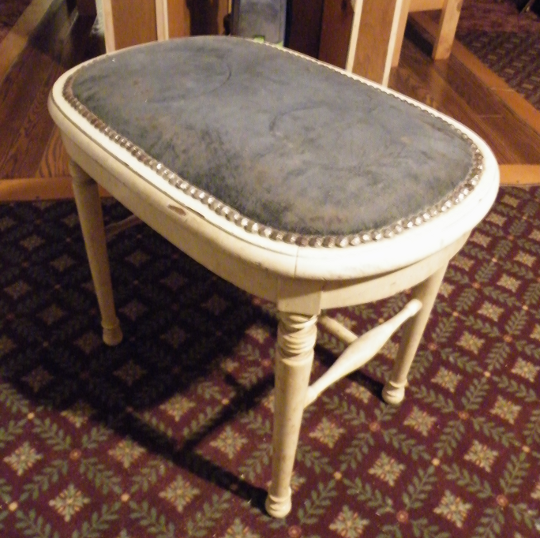
My family has had this white bench as far back into my memory as I can dig. It used to be a brilliant white, with a fresh looking blue cover, rounded out with small studs to hold the blue fabric in place. The white paint faded long ago, and with chipping it looked pretty worn out. The fabric too succumbed to the passing of time, and the bench found itself in storage, left to the first passerby who would give it a home. So one day I did just that and took it home.

It didn’t take long for the bench to become a sticking point in my concentration. Like so many other things, I became obsessed with how it could be improved. I decided that this bench would look so much crisper if the wood grain was exposed, so I began collecting the tools needed to refresh it.

Citristrip

Citristrip

I purchased some Citristrip stripping gel. Gel works well for furniture that isn’t flat, and will stick to surfaces rather then running off as other stripping fluids would. I also purchased a plastic stripping tool, some medium grade steel wool, and a small bottle of Mineral Spirits.
Bench During Stripping - First Application

Bench During Stripping - First Application

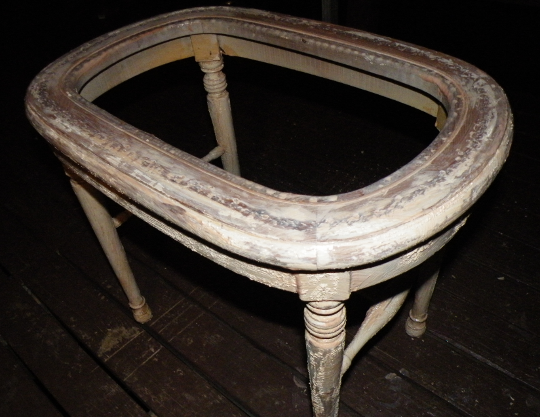
The first step is to move the piece to a well ventilated area, I choose my porch. Then apply the stripping gel with a paint brush and find something else to do for 30 minutes to 24 hours. I applied the gel at night after work, and stripped it the next night. The temperature was just above freezing at the time, making work uncomfortable, but not impossible.
Bench During Stripping - Second Application

Bench During Stripping - Second Application

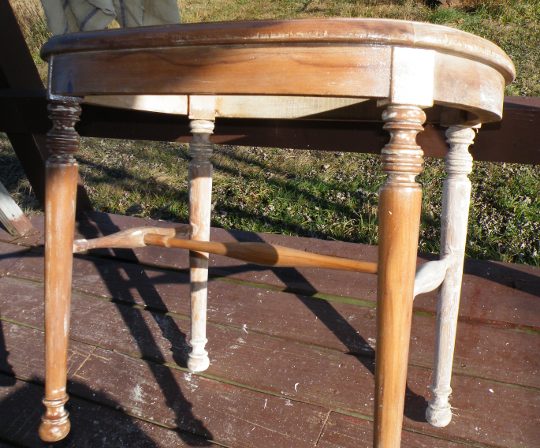
It took a few applications of the stripping gel to remove all of the paint. Once I saw the wood grain, I knew I was on the right path. To clean the finer detailed areas, I used the steel wool to remove the gel after it had sat for 24 hours. A tooth brush also works wonders, and I bet a piece of string would really work well, although I didn’t have any to try out.
Bench Finished

Bench Finished

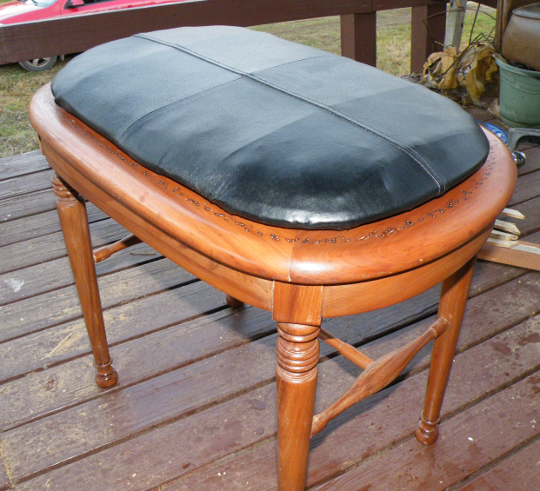
After stripping off all of the paint, I took all of the pieces apart and sanded them down to 200 grit sandpaper, with 800 grit for the areas that would get the most attention. A quick birch stain brought out the grain, and a new leather seat surface rounded out the project.
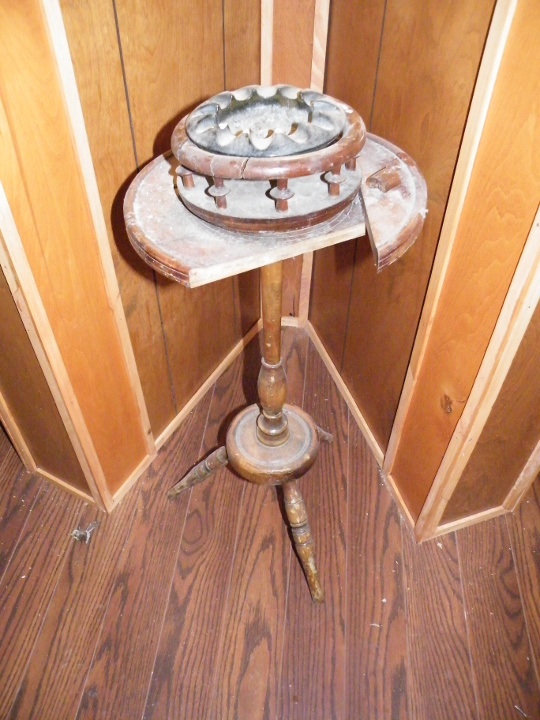
Smoking Stand - Slightly Used, and Very Old !

Smoking Stand - Slightly Used, and Very Old !

Once my sister saw what I did to the bench, she gave me this smoking stand that I helped my father restore about 20 years ago. When we were finished long ago it was quite a beauty, but it fell into disrepair once again.

I again used Citristrip to remove the previous stain and polyurethane, but some of the stain wouldn’t come out of the wood grain, so I tried something new, and showered the stand with water and bleach. The bleach helped even out the colors in the wood, and the hot water helped remove the glue holding the pieces together.
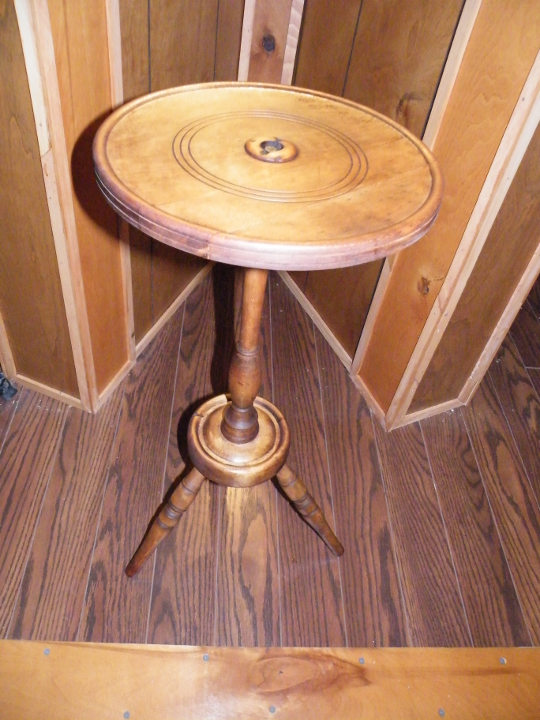
Smoking Stand - Re-purposed as a small end table.

Smoking Stand - Re-purposed as a small end table.

Unfortunately, the top ring under the ashtray had been damaged quite a bit, and It would need a newly fashioned ring to be created. I opted for a different approach. Since I quit smoking some years ago, I thought it pointless to have a smoking stand, so I left the ashtray portion off, and instead created a nice end table. Birch Stain worked well after the bleach was used, and the stand looks beautiful once again.

Posted in Furniture, How To's, Tools | Tagged , , | Leave a comment

Building Bar Stools for My X

An Old Chair - The Inspiration

An Old Chair - The Inspiration

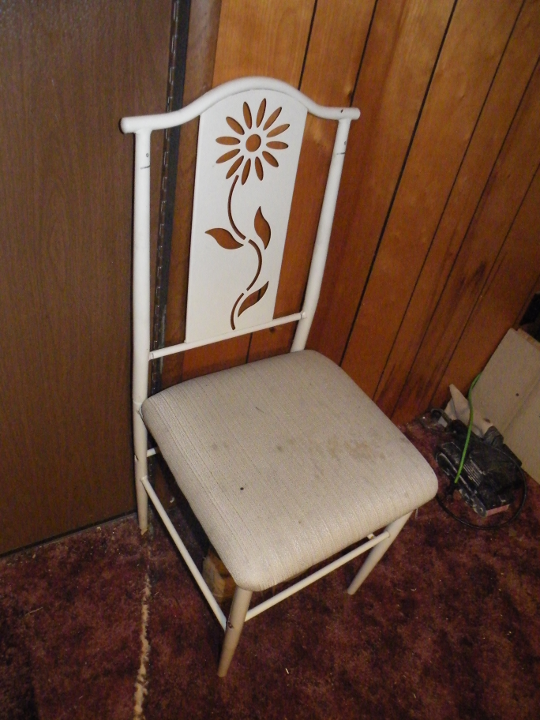
My brother had a kitchen table and four chairs that he no longer wanted, and since I liked the pattern in the backs, I took them home and stored them in my shed. They were very unique, with a flower pattern, but they were also quite worn out. I couldn’t throw them out, but I also had no use for an extra table and chairs until I envisioned them next to my X; My X shaped bar that is, the project that I’ve been busting my tail on all summer long.

After thinking about how I could recycle the design far too much, I finally caved in to my design side and found a use for the decorated backs as part of new bar stools.

Chair Padding Covered with Leather

Chair Padding Covered with Leather

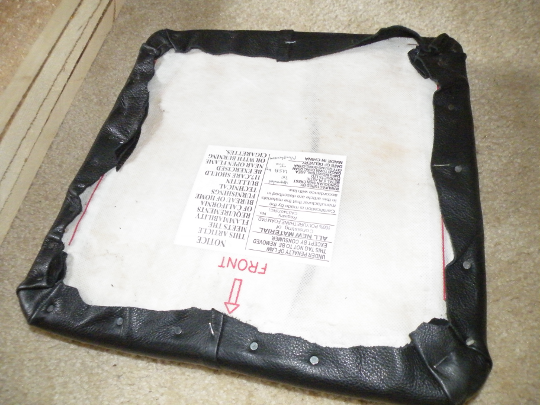
I started my project by removing the seat portion of the chair and covering it with leather from a long worn out leather coat. The coat had seen better days long ago, but it contained enough good material to cover the seat.  I stretched the material tight, and used small tacks to secure it.

Cutting the Legs with a Radial Arm Saw and a Jig

Cutting the Legs with a Radial Arm Saw and a Jig

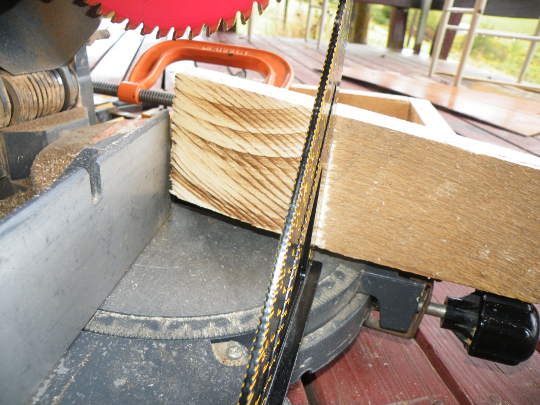
I ran into some trouble when I was cutting the back legs. The first problem was the angle I had chosen. The angle was about 20 Degrees, and my Radial Arm Saw will only cut down to a 45 Degree angle, so I had to use a jig to accommodate the cut. The second problem I had related to the way in which the blade cuts unevenly as the blade is moved through the wood. I worked through this problem by placing the board on an angle to the base, which made the cut even.

The Difficult Parts

The Difficult Parts

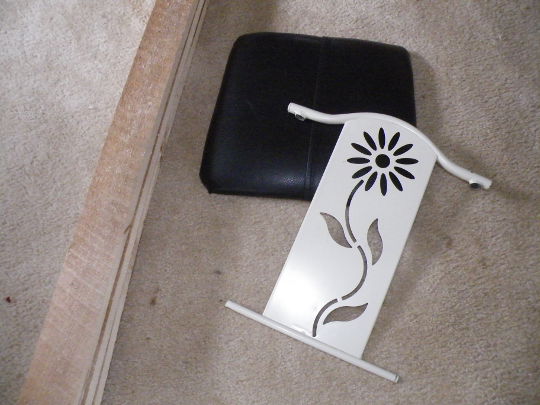
After cutting the legs, I used a hack saw to separate the flower design from the rest of the metal chair. A little flat black paint matched the back to the base, at which point the whole project became very easy.

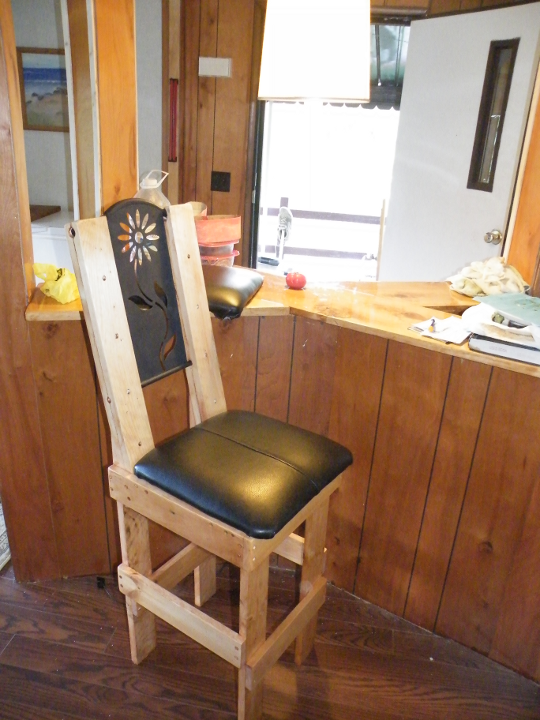
Finished Bar Stool

Finished Bar Stool

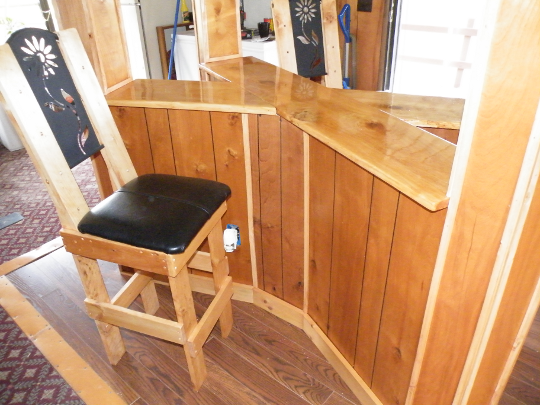
I made the legs 26″ inches to provide an optimal seating height for my bar, and made the back the same length.  I counter-sunk coarse 1/2 inch dry-wall screws to hold the pieces together.  The project was finished up with some birch stain to match the bar top.

Now, If I could someday finish the trim on this X shaped bar, I’d be very happy indeed.

Posted in Building and Construction, New Ideas, Other, Tools | Leave a comment

Getting Started

First Glass Creations

First Glass Creations

It’s taken a good deal of effort, but I’ve finally gotten my Glass Etching setup enough to begin frosting and etching. I’m still a few pieces of equipment shy of a full etching set, but I have enough in place to begin experimenting with designs and techniques.

I tested out my rig with the small spiral design in the center. I designed and even fabricated some of the rig myself, so this small shot glass was meant as a proof of concept. Once again, I was surprised by the result: Not only did my etching system work, but the result also looked great.

After the initial success, I moved onto a deep etching. I etched “Hope” into a funny shaped glass I had laying around the house. I used the etching system to dig relatively deep into the glass, about 1/16 of an inch deep, with the letters protruding, and the material around them etched out.

Once I had experimented with my first two pieces I took a break for a few days, and purchased a air purifying respirator from Home Depot. You see, after a few uses of the etcher it became very clear to me that I would need to protect my lungs. Small bits of glass fly off from the etching process. Even thought I had contained the sand in my barrel design, the metal did nothing to stop a slow leak of glass dust into the air, which found it’s way into my lungs.

Now that I’ve got my respirator, I’ve begun frosting and etching again. I’ll keep posting photos as I get better and produce more intricate designs.

Posted in Glass Etching | Tagged | 2 Comments

Building a Blasting Cabinet

Blasting Concept

Blasting Concept

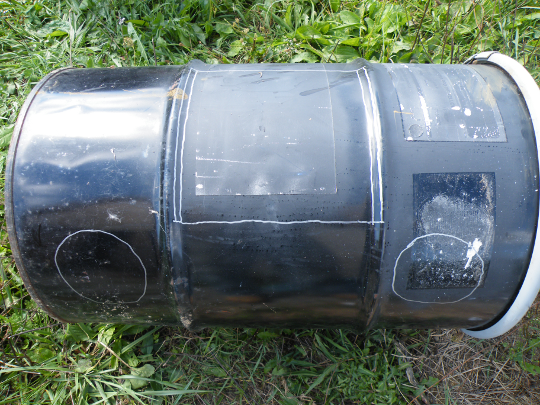
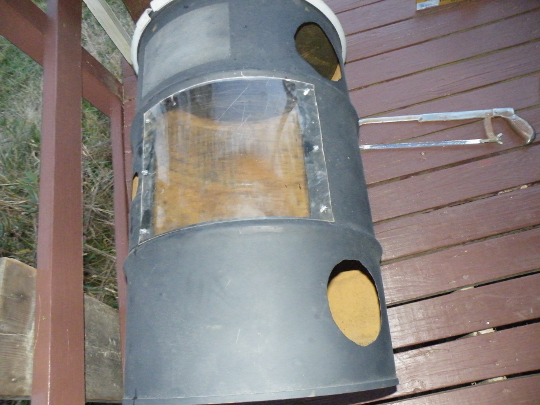
I’ve been investigating how sand blasters work in order to speed up my learning curve. You see, I haven’t saved enough yet to purchase the required equipment, and it may take some time to accomplish this task, so I thought I’d build my own.  I needed a basic metallic structure to contain the sand, and after looking around the farm the most suitable object I found was the metallic barrel in my greenhouse. I had been using two of them as thermal batteries, but I never believed they were large enough to stabilize the temperature, so I began working to upgrade them.
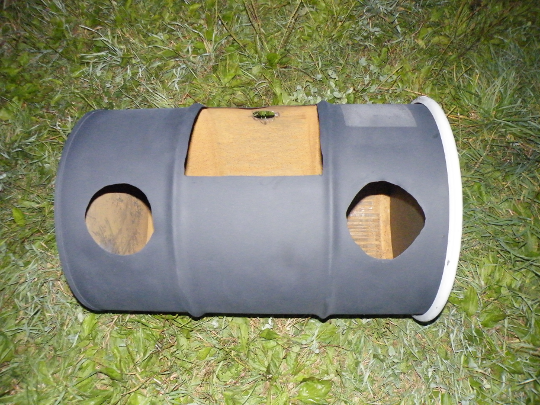
Cut Out and Painted

Cut Out and Painted

After some imagination and lots of starring at the barrel I decided to go ahead with my design, and cut out the basic shapes with a electric grinder. The square hole would be for my eyes to view the object being blasted, and the circular holes would allow my hands into the cabinet to do the work.

Plexiglas Installed

Plexiglas Installed

The next day my sister must have wondered what this crazy cut out object in my yard was and guessed what I was building because she brought me a piece of Plexiglas which was just large enough to cover the viewing square. I attached it with six bolts, and should have applied silicone before tightening them.

Finished Blasting Cabinet

Finished Blasting Cabinet

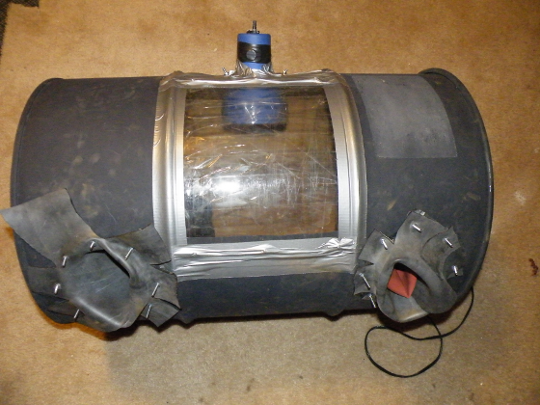
I then waited patiently for my blasting gloves and siphon style blaster before including them in the design several days later. I also inserted an old lamp light into the top to aid in viewing. The gloves were a bit short for my design, so I had to lengthen them with some old tire tubes taped to the gloves and secured to the barrel.

Side Opening Door

Side Opening Door

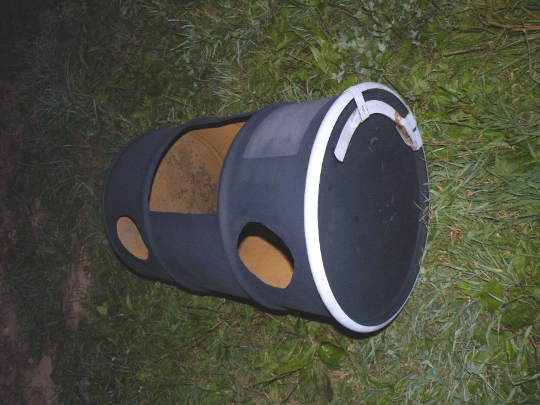
For the door into which objects could be loaded, I decided to use the original mechanics of the barrel. The gray lever shown expands the gray loop when pressed down, which allows the entire lid of the barrel to come off. I settled on this design to allow the largest possible pieces of glass to be loaded inside.

I’m not yet done with the project which still requires a few new components, but If I’m careful, I can etch glass with it, and I have begun to do so. I’ll post pictures soon, but keep in mind I’m still learning, and I’m not using the right materials or equipment. This whole project is part of a much larger mission. Someday I hope to build a blasting room, one that I can walk into to work. This project is a very small prototype of that ambition.

I’ve also picked the last of the peppers for the year, and all of the green tomatoes have turned red. I guess gardening will be on hold till next spring.

Posted in Building and Construction, Glass Etching, How To's, Tools | Tagged , , | Leave a comment